The Complete Shopify Store Setup Guide for Print on Demand (2026)
Quick Overview
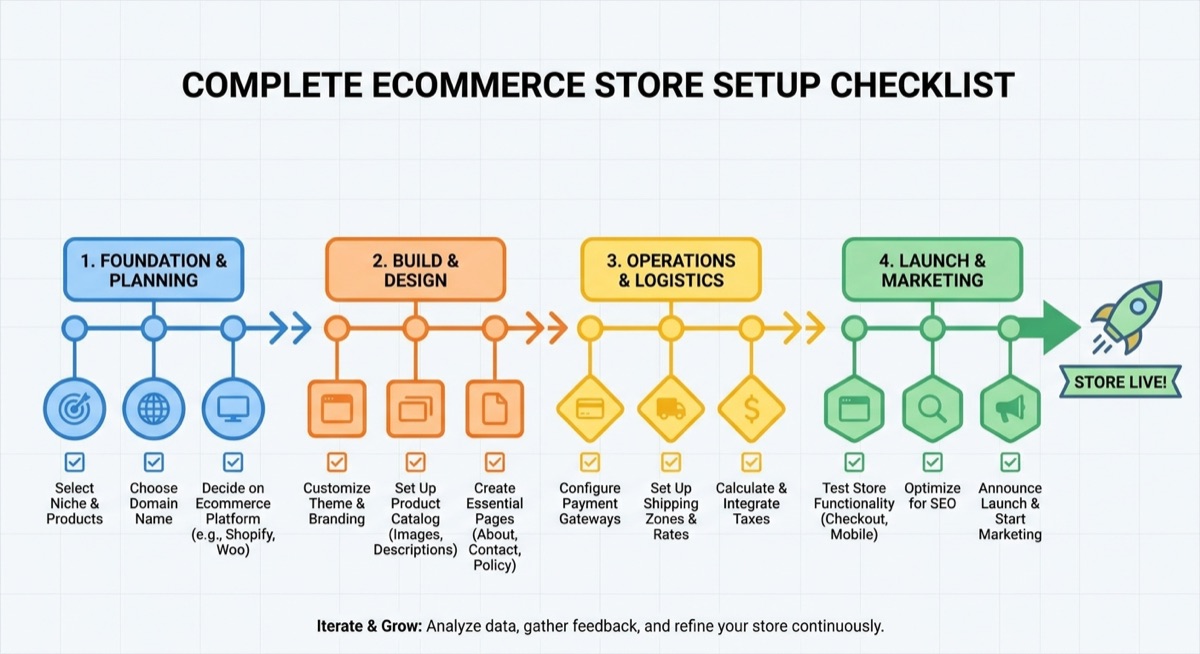
Setting up a Shopify store for print on demand involves choosing the right theme, connecting a POD supplier, creating optimized product pages, configuring payments and shipping, and building trust elements that convert visitors into buyers. This comprehensive guide walks through every step of building a professional POD store that’s ready to drive traffic and generate sales.
Table of Contents
- Why Shopify for Print on Demand
- Creating Your Shopify Account
- Choosing and Customizing Your Theme
- Connecting Print on Demand Suppliers
- Creating Your First Products
- Optimizing Product Pages for Conversions
- Essential Store Pages
- Setting Up Payments and Shipping
- Building Trust Elements
- Essential Apps for POD Stores
- Pre-Launch Checklist
- Frequently Asked Questions
Why Shopify for Print on Demand
Shopify dominates the print on demand space for good reason. It integrates seamlessly with every major POD supplier, handles payments securely, and provides a stable platform that scales with your business.
Shopify vs. Alternatives
Shopify vs. Etsy: Etsy has built-in traffic but takes significant fees (6.5% transaction + listing fees) and limits your branding. Shopify costs a flat monthly fee ($39/month) with lower transaction rates and complete brand control.
Shopify vs. WooCommerce: WooCommerce is free but requires hosting, security management, and technical maintenance. Shopify handles all of that, letting you focus on products and marketing.
Shopify vs. Amazon Merch: Amazon Merch has massive traffic but extreme competition, limited designs per account, and zero customer data. Shopify gives you ownership of your customer relationships.
For most POD sellers—especially beginners—Shopify offers the best balance of ease, features, and scalability.
What You’ll Need
- Email address for business communications
- Business name (can be changed later)
- Payment method for Shopify subscription ($39/month Basic plan)
- Designs ready to upload (or access to design tools like AvatarIQ)
Creating Your Shopify Account
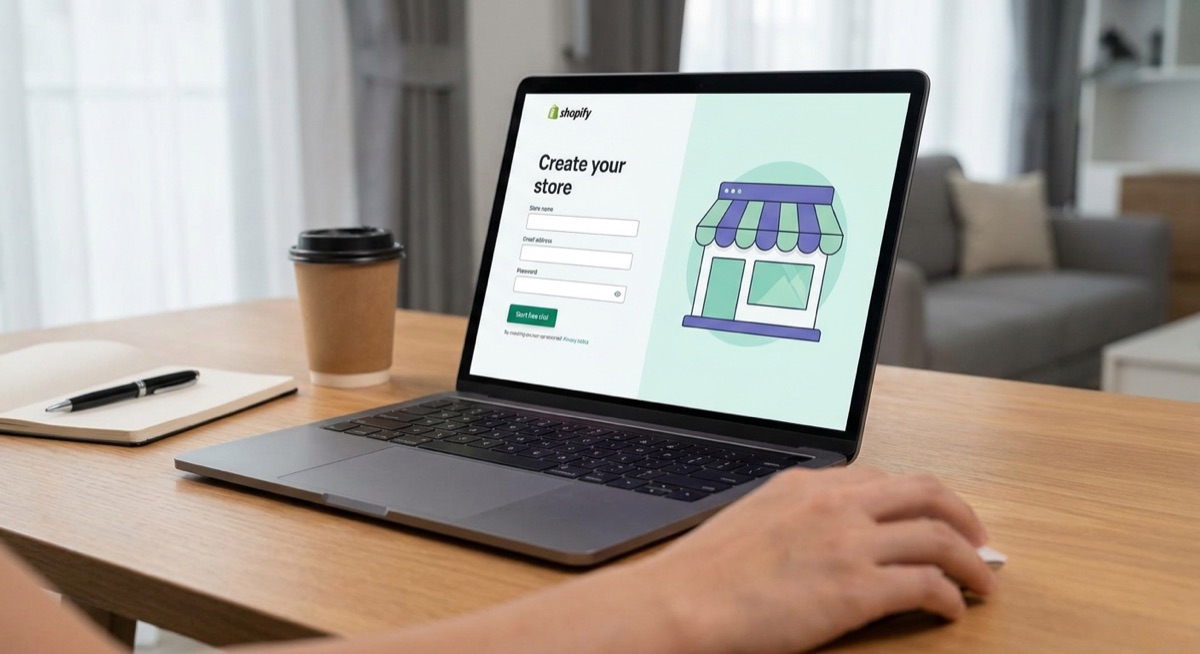
Start at shopify.com and click “Start free trial.” Shopify offers 3 days free, then $1/month for the first 3 months on select plans—plenty of time to set up and test your store before committing to the full $39/month.
Initial Setup Steps
- Enter your email: Use a professional email if possible (yourname@yourbrand.com)
- Create password: Strong, unique password for security
- Store name: This becomes your default URL (yourstore.myshopify.com)
- Answer setup questions: Tell Shopify you’re starting a new business selling products
Choosing Your Store Name
Your store name should be:
- Memorable: Easy to spell and remember
- Relevant: Hints at your niche or products
- Available: Check domain availability before committing
- Scalable: Don’t box yourself in (avoid “JohnsFishingShirts” if you might expand)
Don’t overthink this. You can rebrand later, and your brand name matters less than your products and marketing.
Choosing and Customizing Your Theme
Your theme determines how your store looks and feels. For POD stores, simplicity and speed beat flashy designs every time.
Recommended Free Themes
Dawn (Best for Beginners): Shopify’s default theme is fast, clean, and fully customizable. It’s designed for the latest Shopify features and works great for apparel stores.
Taste: Good for food/lifestyle adjacent niches with a modern, minimal look.
Craft: Works well for artisan/handmade positioning if that fits your brand.
Should You Buy a Premium Theme?
For most new POD stores: No. Free themes like Dawn are fully capable of generating six figures in sales. Premium themes ($150-350) add nice-to-have features but won’t make or break your business. Save your money for ads.
Essential Theme Customizations
Go to Online Store → Themes → Customize to edit your theme:
Header
- Upload your logo (or use text logo to start)
- Set up main navigation menu
- Add announcement bar for promotions
Homepage
- Hero banner with compelling image and CTA
- Featured collection section
- Testimonials or trust badges
- Newsletter signup
Colors and Fonts
- Choose 2-3 brand colors maximum
- Use readable fonts (system fonts are fastest)
- Ensure sufficient contrast for accessibility
Footer
- Quick links to policies
- Contact information
- Social media links
- Payment icons
Connecting Print on Demand Suppliers
Your POD supplier is your fulfillment partner. They print and ship products directly to your customers. Choosing the right one affects product quality, shipping times, and profit margins.
Top POD Suppliers for Shopify
Printful
Best for: Quality-focused brands
- Pros: Excellent print quality, reliable fulfillment, good US/EU shipping
- Cons: Higher base prices than competitors
- Typical t-shirt cost: $12-14 + shipping
Printify
Best for: Price optimization
- Pros: Multiple print providers, competitive pricing, wide product selection
- Cons: Quality varies by provider
- Typical t-shirt cost: $8-12 + shipping
Gelato
Best for: International sellers
- Pros: Global fulfillment network (30+ countries), consistent quality
- Cons: Smaller product catalog
- Typical t-shirt cost: $10-13 + shipping
How to Connect Your Supplier
- Go to the Shopify App Store
- Search for your supplier (Printful, Printify, or Gelato)
- Click “Add app” and follow the connection prompts
- Create an account with the supplier if needed
- Authorize the connection to your store
Once connected, you can create products in the supplier’s dashboard and push them directly to Shopify.
Creating Your First Products
With your supplier connected, it’s time to create products. This is where your designs come to life on actual merchandise.
Design Requirements
Most POD suppliers require:
- Resolution: 300 DPI minimum
- Format: PNG with transparent background
- Size: Varies by product (t-shirts typically 4500×5400 pixels)
If you don’t have design skills, AI tools like AvatarIQ generate print-ready designs from text prompts. At $97/month for 275 credits, it’s purpose-built for POD sellers who need professional output without the learning curve.
Product Creation Workflow
- Open your supplier’s app in Shopify
- Select product type (t-shirt, hoodie, etc.)
- Choose specific product (Bella+Canvas 3001, Gildan 5000, etc.)
- Upload your design and position it
- Select colors to offer (start with 3-5 popular colors)
- Set your retail price (see pricing section below)
- Write title and description
- Push to Shopify
Pricing Your Products
Your price must cover: base cost + shipping + ad spend + profit margin.
Typical POD pricing formula: Base cost × 2.5 to 3x
Example:
- T-shirt base cost: $12
- Retail price: $29.99 – $35.99
- Gross profit: $17.99 – $23.99
- After ad costs (~$10): $7.99 – $13.99 net profit
2026 Price Benchmarks:
- T-shirts: $24.99 – $34.99
- Hoodies: $44.99 – $59.99
- Tank tops: $22.99 – $29.99
- Mugs: $16.99 – $24.99
Optimizing Product Pages for Conversions
Your product page is where buying decisions happen. Every element should reduce friction and increase confidence.
Product Images
Use multiple high-quality mockup images:
- Main image: Clean product shot on white or neutral background
- Lifestyle image: Product in context (someone wearing it)
- Detail shot: Close-up of print quality or fabric
- Size/fit image: Shows how it looks on different body types
Your POD supplier provides basic mockups, but consider using mockup generators (Placeit, Printful’s generator) for more variety.
Product Titles
Effective product titles include:
- Primary keyword (what is it)
- Key feature or benefit
- Niche relevance
Examples:
- “Funny Fishing Dad T-Shirt – Reel Cool Father Gift”
- “Nurse Life Hoodie – Healthcare Worker Appreciation”
- “Dog Mom Shirt – Paw Print Heart Design”
Product Descriptions
Write descriptions that sell the experience, not just the product:
Structure:
- Opening hook: Speak directly to the customer’s identity or desire
- Emotional benefit: How will they feel wearing this?
- Product details: Fabric, fit, care instructions
- Size guidance: Recommend sizing based on fit preference
- Trust element: Satisfaction guarantee, shipping info
Social Proof
Add reviews as soon as possible. Even 5-10 reviews dramatically increase conversion rates. Options:
- Ask early customers for reviews
- Use review apps that offer photo reviews
- Import reviews from other platforms (if legitimate)
Essential Store Pages
Beyond product pages, your store needs supporting pages that build trust and answer customer questions.
About Page
Tell your story. Why does your store exist? What do you stand for? Customers connect with brands that have personality and purpose.
Include:
- Your brand story and mission
- Who you serve and why
- What makes you different
- Photos if comfortable (adds authenticity)
Contact Page
Make it easy to reach you. Include:
- Contact form
- Email address
- Expected response time
- FAQ link for common questions
Shipping Policy
Be transparent about shipping times. POD has longer fulfillment than traditional retail.
Include:
- Processing time (typically 2-5 business days for POD)
- Shipping time by region
- Tracking information availability
- International shipping options
Return/Refund Policy
Clear return policies reduce purchase anxiety. For POD:
- Explain that items are made-to-order
- Offer replacements for defective/damaged items
- Consider satisfaction guarantees for high-ticket items
- Detail the process for reporting issues
Privacy Policy & Terms of Service
Required for compliance. Shopify provides generators for both:
- Settings → Legal → Create from template
- Customize with your business name and details
Setting Up Payments and Shipping
Payment Providers
Shopify Payments is the easiest option for US/Canada stores:
- No transaction fees beyond credit card processing
- 2.9% + 30¢ per transaction (Basic plan)
- Supports all major credit cards
- Apple Pay and Google Pay included
If Shopify Payments isn’t available in your country, use Stripe or PayPal as alternatives.
Shipping Configuration
For POD stores, shipping is handled by your supplier. But you need to configure how it appears to customers:
Option 1: Free Shipping (Baked into Price)
- Raise product prices by $4-5 to cover shipping
- Offer “Free Shipping” as marketing angle
- Works well for Facebook ads
Option 2: Calculated Shipping
- Show actual shipping costs at checkout
- More transparent but can cause cart abandonment
- Better for higher-priced items
Option 3: Flat Rate Shipping
- $4.99 flat rate regardless of order size
- Simple to understand
- May lose money on single-item orders, profit on multi-item
Most successful POD stores use free shipping with inflated prices or flat rate shipping.
Building Trust Elements
New stores face a trust deficit. Visitors don’t know you. These elements bridge the gap.
Trust Badges
Display security and payment icons:
- SSL secure checkout badge
- Payment method icons (Visa, Mastercard, PayPal, etc.)
- Money-back guarantee badge
- Secure payment icons
Social Proof
- Customer reviews with photos
- Instagram feed showing customer photos
- “As seen in” logos if you have press
- Customer count (“Join 10,000+ happy customers”)
Contact Accessibility
- Visible contact information
- Live chat option (even if it’s just you responding)
- Clear response time expectations
Professional Design
- Consistent branding throughout
- No broken images or placeholder text
- Mobile-responsive design
- Fast loading times
Essential Apps for POD Stores
Keep your app stack lean. Every app adds cost and can slow your store. These are the essentials:
Must-Have Apps
Your POD Supplier App (Printful, Printify, or Gelato)
- Connects your supplier to your store
- Syncs products and orders automatically
- Free (costs are per-product)
Reviews App
- Loox, Judge.me, or Stamped.io
- Collects and displays customer reviews
- Judge.me has a solid free plan
Email Marketing
- Klaviyo (free up to 250 contacts)
- Automated flows: welcome, abandoned cart, post-purchase
- Essential for repeat customers
Nice-to-Have Apps
Upsell/Cross-sell App
- ReConvert or Bold Upsell
- Increases average order value
- Add after you have consistent sales
Pop-up App
- Privy or Justuno
- Captures emails with discount offers
- Exit-intent popups reduce bounce
Pre-Launch Checklist
Before sending any traffic to your store, verify everything works:
Technical Checks
- ☐ Place a test order (most suppliers allow free test orders)
- ☐ Check all links work (no 404 errors)
- ☐ Test on mobile devices
- ☐ Verify checkout process completes
- ☐ Check email notifications are sending
- ☐ Review site speed (aim for under 3 seconds)
Content Checks
- ☐ All product descriptions complete
- ☐ All images uploaded and displaying
- ☐ Pricing is correct across all products
- ☐ No placeholder text remaining
- ☐ Spelling and grammar checked
Legal/Policy Checks
- ☐ Privacy policy published
- ☐ Terms of service published
- ☐ Shipping policy published
- ☐ Refund policy published
- ☐ Contact information visible
Marketing Preparation
- ☐ Facebook Pixel installed
- ☐ Google Analytics connected
- ☐ Email capture pop-up configured
- ☐ Welcome email sequence ready
- ☐ Abandoned cart emails configured
Frequently Asked Questions
How much does it cost to start a Shopify POD store?
Budget $500-1,000 for your first 90 days: Shopify subscription ($39/month), domain name ($15/year), design tools like AvatarIQ ($97/month), and Facebook ad budget ($300-500 for initial testing). You can start with less, but smaller budgets mean slower progress.
How long does it take to set up a Shopify store?
Basic setup takes 1-2 days. A fully optimized store with multiple products, polished copy, and all trust elements typically takes 1-2 weeks of part-time work. Don’t rush—a professional-looking store converts better.
Should I use a custom domain?
Yes, eventually. A custom domain (yourbrand.com instead of yourbrand.myshopify.com) looks more professional and builds brand recognition. Cost is about $15/year. You can start with the free myshopify.com domain and upgrade once you’re committed to the business.
How many products should I launch with?
Start with 5-15 products in your initial niche. Enough variety to test what resonates, but not so many that you’re spread thin. It’s better to have 10 well-researched products than 100 random ones.
Do I need a business license to sell on Shopify?
Requirements vary by location. In the US, you can start as a sole proprietor without formal registration. As you grow, consider forming an LLC for liability protection. Consult a local accountant for specific requirements in your area.
What’s the best POD supplier for beginners?
Printful is the safest choice for beginners—reliable quality, good documentation, and straightforward integration. Once you’re profitable, you can test Printify for better margins or Gelato for international orders. Start simple, optimize later.
How do I get my first sales?
Most POD stores get their first sales through Facebook/Instagram ads. Start with a small daily budget ($10-20), target interests relevant to your niche, and test multiple ad creatives. The Skup Apparel Cloning System teaches this methodology in detail.
What if my products don’t sell?
That’s normal. Most POD sellers test 10-20 designs before finding consistent winners. The key is systematic testing: research what’s already selling, create variations, test with small ad budgets, cut losers fast, and scale winners. Don’t get attached to designs that don’t convert.
The Bottom Line
Setting up a Shopify print on demand store is straightforward when you follow a systematic process. Choose a clean theme, connect a reliable supplier, create research-backed products, build trust through professional presentation, and prepare for marketing before you launch.
The store itself is just the foundation. What determines success is what comes next: researching winning designs, running effective ads, and continuously optimizing based on data. Programs like the Skup Apparel Cloning System and Incubator coaching provide the methodology and support to turn your store into a profitable business.
Start simple, launch quickly, and improve iteratively. A live store generating data is more valuable than a perfect store that never launches.