T Shirt Mockup AI: How to Create Listing-Ready Images
Generative AI investment reached $25.2 billion in 2023, nearly nine times the 2022 level, according to Stanford's 2024 AI Index. That scale of funding is why T shirt mockup AI has moved from a novelty to a practical listing tool for small sellers. You no longer need a sample, a model, and a studio day before you can test a design in public.
That speed is exciting, and it's also where beginners get tripped up. A fast image isn't automatically a true image. The sellers who win with AI treat trust as part of the workflow, checking print, color, and fit before a buyer ever sees the listing. Do that, and each new design gets easier, faster, and more profitable to launch.
Table of Contents
- The Five-Stage Workflow for AI T-Shirt Mockups
- How to Write Prompts That Produce Clean Garment Shots
- How to Build the Full Listing Image Set
- Catching Accuracy Problems Before Customers Do
- Disclosing AI Mockups Without Losing Buyer Trust
- Testing AI Mockups Against Standard Photos
- Publish Your First AI Mockup Set This Week
The Five-Stage Workflow for AI T-Shirt Mockups
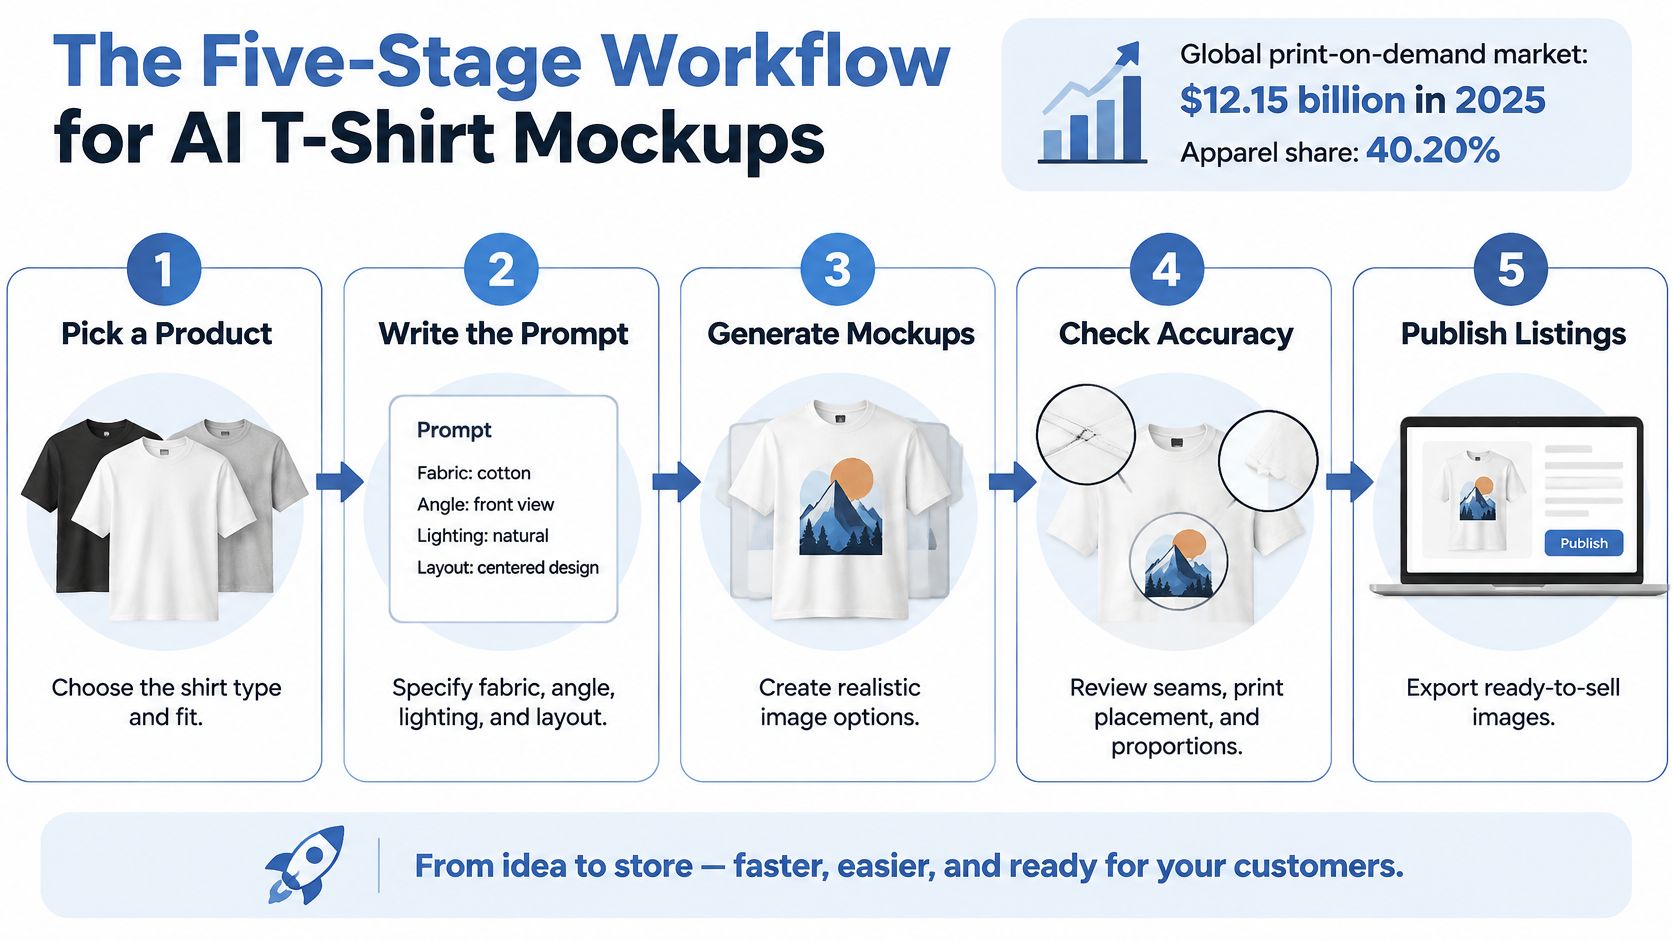
The opportunity is large enough to justify building a real process. Mordor Intelligence's print-on-demand market report valued the global print-on-demand market at USD 12.15 billion in 2025, with apparel accounting for 40.20% of revenue. In a market that size, the seller who reaches a listing-ready image set first, without sacrificing accuracy, tests more designs and learns faster.
Treat T shirt mockup AI as a five-stage pipeline, not a one-click trick. Each stage produces one clear output, and you don't move on until that output passes its check.
The Five Stages in Order
- Prepare the exact artwork. Lock the print file you'll send to production, at master resolution, before you generate anything.
- Generate a front-facing garment image. Write out shirt color, fabric, fit, lighting, pose, and background so the generator isn't guessing.
- Produce the full view set. Build front, back, close-up, and scale-reference images from that same foundation.
- Inspect the print area at high resolution. Zoom in and look for wobbly letters, soft edges, and invented detail.
- Compare against the original artwork. Put the mockup and the print file side by side and confirm placement, scale, and color.
| Stage | What You Produce | Pass Check Before Moving On |
|---|---|---|
| 1. Prepare artwork | Exact print file at master resolution | File matches the approved design |
| 2. Generate garment image | Front-facing mockup built from written specs | Shirt color, fabric and fit match your spec |
| 3. Produce views | Front, back, close-up and scale-reference images | Each view shows the same garment and print scale |
| 4. Inspect print area | High-resolution check of the print zone | Text, edges and typography stay sharp |
| 5. Compare to artwork | Side-by-side review against the original file | Print placement and colors match the artwork |
The division of labor stays simple throughout. AI builds the scene quickly. You verify garment geometry, print scale, and color. That human check takes minutes and prevents the expensive kind of mistake, the one a customer finds first.
A mockup that fails stage 5 goes back to stage 2. It doesn't go on the listing.
Save your prompts and keep the order identical for every design. Your second listing will already feel faster than your first, because you're reusing decisions instead of remaking them. That repeatability is the advantage. It turns a single good mockup into a system you can run across an entire catalog, and it gives a beginner store the polished look buyers expect from established apparel brands.
How to Write Prompts That Produce Clean Garment Shots
Vague prompts invent details. A missing fabric weight becomes a new texture, a loose color word becomes the wrong shade, and that invented detail turns into a return when the shirt arrives. Write the prompt like a spec sheet you would hand to a photographer who has never seen your product. Precision here protects buyer trust later.
Write the Spec in Seven Moves
- Name the garment precisely. Say heavyweight crewneck tee in 6.1 oz cotton, not just t-shirt. Weight and construction control how the fabric drapes and folds.
- Fix the color with a named shade. Write heather navy instead of dark blue. A named shade ties the image to the color name in your listing, so a buyer comparing options sees what they will select.
- Specify fit and sleeve length. Relaxed fit, dropped shoulders, short sleeves gives the generator a silhouette. Skip this and you will get a different body shape in every generation.
- Set soft, even lighting. Ask for soft front-left studio light with no hard shadow. Harsh directional light creates ridges that read as embroidery or heavy texture, and that misleads buyers about how the print is made.
- Choose pose and framing on purpose. Use a flat lay when accuracy matters most, since nothing stretches or folds across the print. Use a model when you want lifestyle context and a sense of how the shirt wears.
- Describe the background in one plain clause. A plain light grey backdrop keeps attention on the print and makes color easier to judge.
- Add a negative instruction. State no extra seams, no distressing, no added embroidery, no logos, no text beyond the artwork. Generators decorate when you do not forbid it.
Keep the design side just as disciplined as the mockup spec, with clean files and consistent AI clothing design practices before you generate any garment shots.
Save the Prompt as a Template
Once a spec produces a clean result, save it with blank slots for artwork and color. Every new design then starts from a proven base instead of a blank page. You will change two or three words, not rewrite the whole brief, and your catalog will look like it came from one shoot.
| Variable | What It Controls | Example Value |
|---|---|---|
| Garment and weight | Shape and drape | Heavyweight crewneck tee, 6.1 oz cotton |
| Shirt color | Color accuracy against the file | Heather navy, not dark blue |
| Fit | Silhouette and sleeve length | Relaxed fit, dropped shoulders, short sleeves |
| Lighting | Shadows and fabric texture | Soft front-left studio light, no hard shadow |
| Pose and framing | First impression and garment visibility | Flat lay, centered, full garment in frame |
| Background | Focus on the print | Plain light grey seamless backdrop |
| Print placement | Where the artwork sits | Centered on chest, about 3 inches below the collar |
Judge the first result with fresh eyes. Look for a print that sits centered, colors that sit close to your file, and proportions that look normal to anyone who has held a real shirt. Collar width, sleeve length, and shoulder slope should all read as ordinary, with no surprise puckering around the neckline.
If something looks off, change one variable at a time and regenerate. Changing four things at once leaves you guessing which edit helped. I recommend fixing lighting and color before touching pose, since those two cause most accuracy complaints. Get the front view right here, and every other view in the set becomes a small edit instead of a new negotiation.
How to Build the Full Listing Image Set
One good front view doesn't close a sale. Buyers want to see the back, inspect the print up close, and judge the design's size. Build the whole set from your one locked prompt so the shirt doesn't change identity between images.
Generate Each View From the Same Spec
- Front view first. Run your saved prompt exactly as written. This is your anchor image, and every other view gets compared against it.
- Back view second. Change only the view instruction. Reuse the same color name, fabric, fit, and lighting words word for word, so the garment can't drift into a different shade or silhouette.
- Close-up of the print. Crop tight on the chest area to judge edges, letterforms, and fine lines at full size. If small text falls apart here, it will fall apart for buyers too.
- Scale reference. Show the shirt beside a familiar object or on a body so shoppers can judge print size without guessing.
- Export one high-resolution master. Keep the full print intact in this file. Every crop you publish should come from it.
- Export your crops from the master. Make a square crop for grid thumbnails and a taller crop for the product page. Our reference for Shopify image sizes helps you match each crop to where it will appear.
Buyers judge images before they read a word. Baymard Institute's research on product image resolution and zoom found that 56% of users in usability testing immediately explored product images after reaching a product page, while 25% of ecommerce sites provided images that were insufficient for visual evaluation. Low-quality or non-zoomable images contributed to product abandonment, which means a weak image set costs you sales you've already earned with good traffic.
Order and Name the Gallery
Arrange the gallery as clean front, back, close-up, scale reference, then any lifestyle scene. The accurate product view leads, and the emotional context supports it. Name every file with SKU, view, and size, something like TEE-NAVY-front-square, so you never upload the wrong variant at midnight.
Check thumbnail legibility before you publish. Shrink the front view to grid size and confirm the design still reads clearly. Then confirm sleeve seams, neckline shape, artwork scale, and color match across views with your own eyes. Watch for shadows that fake embroidery or distressing your print doesn't have. The model generates. You sign off. That habit keeps a fast T shirt mockup AI workflow from publishing a beautiful image of a shirt you don't sell.
Catching Accuracy Problems Before Customers Do
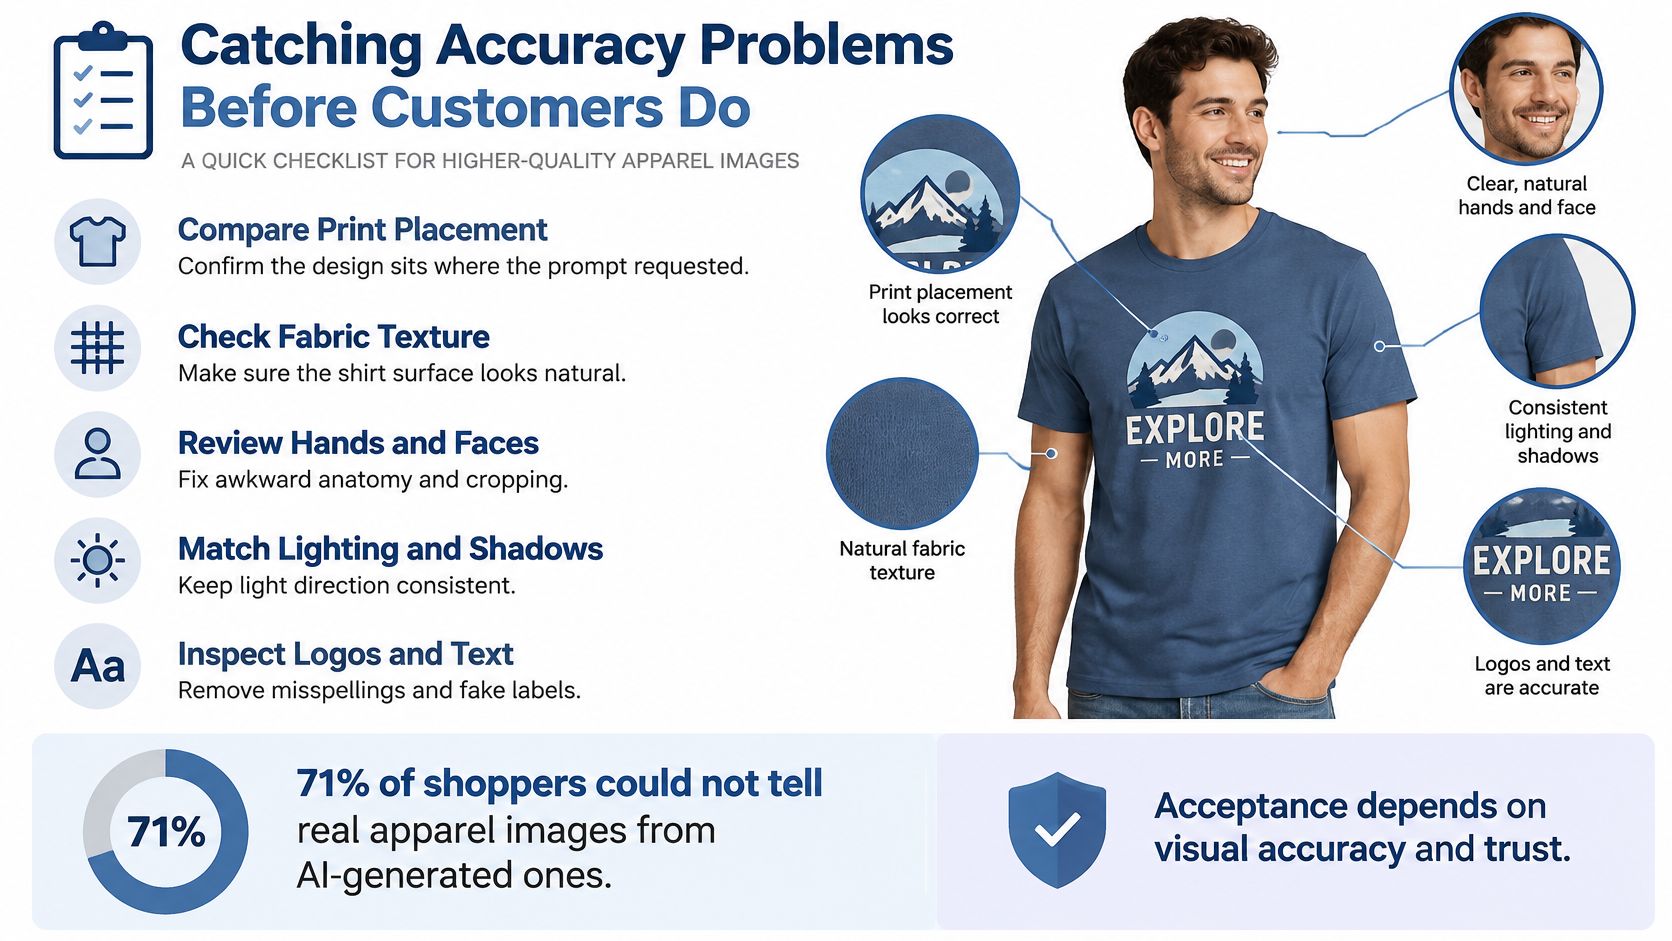
Melted print text is the error that slips through most often. The shirt looks great at full size, the scene looks real, then you zoom to 100% and letters lean, thin lines break, and the word a buyer reads first is misspelled. Treat that check as a routine step, not a matter of having a good eye.
A convincing image still has to match the physical shirt. Shoppers often cannot tell a clean AI render from a studio photo when fit and fabric look right, which raises the bar for accuracy. Returns follow when the garment that arrives disagrees with the picture, and those returns carry a support thread and a review risk with them.
Diagnose the Five Usual Errors
| Symptom | Likely Cause | Fix |
|---|---|---|
| Warped or wobbly print text | The model redraws letters instead of placing the artwork | Place the exact artwork file onto the garment and check it at high resolution |
| Extra seam or neckline detail | The model invents garment geometry | Add a no-extra-seams instruction and compare against a flat lay of the real blank |
| Shadow reads as embroidery or texture | Harsh directional light | Switch to soft even lighting and regenerate |
| Print unreadable at thumbnail size | Print too small in the frame | Frame the garment closer and check the thumbnail crop |
| Color drifts between views | Each view generated with different color wording | Reuse the locked color name in every prompt |
Fixes are cheap here. Regeneration takes a minute.
The same error found by a customer costs a return label, a support conversation, and sometimes a review that names the image. Sellers who build formal checks into their process, the way our guide to quality assurance procedures lays out, stop paying that tax almost entirely. I recommend sorting errors into instant rejects, like wrong spelling or wrong color, versus acceptable variations in wrinkle pattern that still represent the true garment.
Run the Sign-Off Checklist
- Compare print scale against the production file, not against your memory of it.
- Verify shirt color under realistic lighting, and confirm it matches the variant name in the listing.
- Show front and back views so buyers aren't guessing about the half they can't see.
- Include a size chart in the gallery or description, since no mockup communicates measurements.
- Order a physical sample for every best-selling design, and photograph it once sales justify the effort.
Aim for trustworthy realism, not maximum realism. A slightly plainer image that matches the shirt outsells a gorgeous one that doesn't, because it doesn't come back in a return bag.
You do not need expensive gear or flawless taste to publish accurate images. You need a checklist you run every time. Once that habit holds, the riskiest step in a T shirt mockup AI workflow becomes the most boring one. Boring is exactly what protects margin.
Disclosing AI Mockups Without Losing Buyer Trust
74% of consumers say disclosure of AI-generated content matters to them, while only 26% of brands currently provide it, according to Adobe's 2025 AI and Digital Trends report for retail that found 74% of consumers consider disclosure important. That gap is a trust opening for print-on-demand sellers. A buyer who later realizes a lifestyle photo was synthetic does not admire the technique. They question the shirt, the fit, and the refund policy in one motion.
Treat disclosure as return prevention, not legal fine print. The sellers who keep returns low state clearly what the image shows and what it does not show, before the buy button gets clicked.
Match the Wording to What You Actually Did
Disclosure is not one label. Use wording that fits the production method:
AI-created design. The artwork itself came from a generator. State that the design was created with AI assistance, since the art is part of what the buyer pays for.
AI-enhanced background. The garment photo is real and the scene is generated. One sentence covers it: "Photo of physical shirt; background generated with AI." Short and specific beats clever.
Fully synthetic model shoot. Person, setting, and presentation are generated. Say so plainly next to the gallery. Keep at least one accurate, flat product view in the set so size, print placement, and color have a neutral reference. That hybrid set protects you. The lifestyle image sells the idea, the clean view limits the misunderstanding that turns into a support ticket.
Put the note beside the images or in the first lines of the description. A disclosure buried at the bottom of a long page will not stop a return. You are informing, not apologizing.
Claims That Still Need a Real Sample
Some statements cannot rest on a generated image. Fit, fabric weight, print size, and color accuracy require a physical shirt and a tape measure before you list them as facts. A mockup can suggest a relaxed fit. Only a sample confirms shoulder width and body length.
I recommend holding lifestyle images to a simple rule: use them to show context, never to promise measurements. Transparent sellers write stronger listings because of this discipline. Once you decide exactly what is real and what is generated, descriptions get sharper and support answers get shorter. Trust builds across every design you publish after that, and it is an asset no competitor can copy with a better prompt.
Testing AI Mockups Against Standard Photos
Creating images is half the job. The other half is finding out which images sell your shirt. Don't guess, and don't assume the AI lifestyle shot wins just because it looks impressive to you. Run a simple test and let buyer behavior decide.
Set Up Three Image Treatments
Hold product, price, copy, audience, and traffic constant. Change only the images, rotating three treatments for the same listing.
| Test Arm | Image Treatment | What It Tells You |
|---|---|---|
| A | Standard mockup only | Baseline click-through and conversion |
| B | AI lifestyle mockup only | Whether scene context lifts engagement |
| C | Hybrid: clean product view plus AI lifestyle scene | Whether accurate product detail and context together lift conversion |
Arm A gives you the honest baseline you need before crediting AI with anything. Arm B shows what pure scene context does on its own. Arm C, the hybrid, is where I'd start a new listing by default, since the clean product view works as a verification asset while the lifestyle image carries the emotional appeal.
Track the Metrics That Reveal Trust
- Click-through rate shows whether the thumbnail earns attention in the grid.
- Add-to-cart rate shows whether the gallery convinces after the click.
- Purchase conversion is the number that pays you.
- Refund and return rate exposes images that overpromised.
- Customer-service complaints and comments about fit or color tell you exactly which image misled people.
Run the test until each SKU and traffic source shows a stable pattern, not just a good afternoon. Then segment results by device and market. Thumbnails dominate mobile discovery, so a treatment that wins on desktop can lose on a phone where your print is two centimeters wide.
Keep one warning in mind while you read results. Coverage of Baymard's research on AI-generated product photos found that 60% of surveyed U.S. online shoppers would feel less confident buying a product if they knew its image was AI-generated. That measures stated confidence, not an actual sales decline, so treat it as a trust signal to test against rather than a forecast. Your own conversion and return numbers outrank any survey.
Material accuracy feeds the same test. If you're producing any garments in-house or comparing decoration methods, this material guide for custom apparel makers from Raccoon Transfers helps you understand how different materials behave under a heat press, which affects whether your physical product matches what T shirt mockup AI promised. When the shirt and the image agree, your test results get cleaner and your returns stay low.
Publish Your First AI Mockup Set This Week
Don't rehearse the whole method again. Ship one listing this week and let real buyers start teaching you.
- Pick one design that already has demand. A proven concept gives your first test a fair chance.
- Clone it with AvatarIQ. The T-Shirt Design app is a cloning tool, not a text-to-image generator, and it works from proven, already-winning designs rather than a blank prompt. AvatarIQ was created specifically for print-on-demand apparel and jewelry businesses, so you're starting where the tool is strongest.
- Fill your saved slots for color, fabric, fit, and lighting, then generate front, back, close-up, and scale views from that one spec.
- Run the sign-off checklist and place one disclosure line beside the gallery.
- Publish with the clean product image first, then leave click-through, add-to-cart, conversion, and returns alone for a few weeks so the pattern can settle.
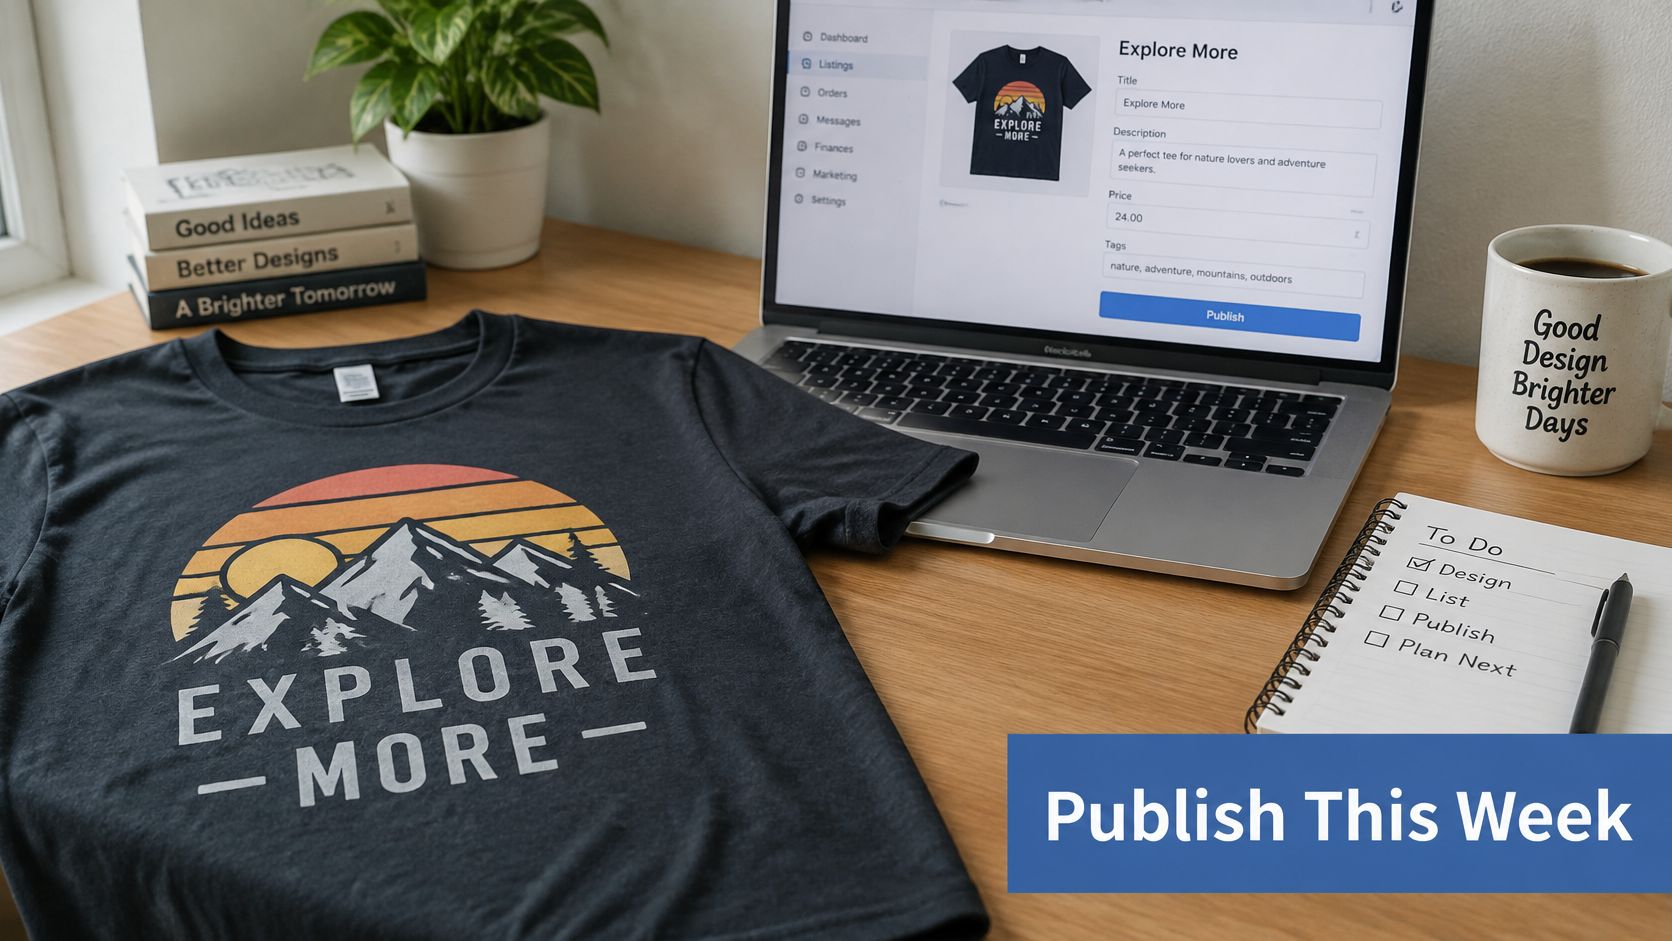
Assets you create can go on Etsy, on social posts, or to friends and family, and paid ads aren't required to start. That's a friendly on-ramp for a first listing. The first set is the slow one, and that's fine. Every design after it reuses your spec, your checklist, and your gallery order. A beginner with that habit lists faster every week, and that pace is a real edge in a growing apparel market.
Ready to turn your first mockup set into a repeatable system? Skup's Apparel Cloning System walks you from finding proven designs to publishing polished listings, with AvatarIQ handling the design and mockup work along the way. Visit Skup to see how the training, software, and coaching fit together, and start building your store this week.