Custom Next Level Shirts: How to Design and Print
You've got a design you believe in. It's exported, saved in three places, and you've looked at it on a screen enough times that you could redraw it from memory. What you don't have is a decision on which shirt it goes on, and every blank in the supplier catalog looks roughly the same in a thumbnail.
That's where most first-time sellers stall. The blank feels like a small detail next to the artwork, so it gets chosen last, usually by price or by whichever color looks good in a swatch. Then the sample arrives, the print sits half an inch low, the red reads orange, and the listing goes live with photos that don't match what ships.
This changes how you shop. The fabric decides the print method. The print method decides the design style. The design style decides who buys. Pick the shirt first and every other decision narrows, because the blank rules out the options that were never going to work.
Table of Contents
- Choosing the Right Next Level Blank
- How to Place a Design for Shirts That Sell
- Why Prints Crack and How to Fix Them
- Run Your Print-on-Demand Workflow From Mockup to Delivery
- Custom Next Level Shirt Ideas That Work in Practice
- Order Your First Sample Shirt This Week
Choosing the Right Next Level Blank
Next Level Apparel didn't start as a fashion label. It started in 2003, after customers asked for higher-quality T-shirts built specifically for decoration, as the Promogram industry profile of the company's founding and growth explains. The first style, the 6200 Unisex Festival Tee, was developed around a lightweight, comfortable fabric with a smooth, polyester-rich surface designed to sublimate well. Its original fabric ran 65% polyester and 35% combed ring-spun cotton.
That history matters when you're shopping for custom Next Level shirts, because the brand was built around decorators, promotional distributors and apparel entrepreneurs rather than around retail fashion. By 2021, the same reporting described Next Level as an approximately $200 million business, ranked eighth among major North American promotional-products suppliers.
The decision rule that saves you a reprint
Match the fiber to the ink and the rest falls into place.
- Polyester-rich blanks take sublimation and vivid all-over prints. Dye turns to gas and bonds with the polyester, so the color lives in the fabric instead of sitting on top of it.
- Cotton-heavy blanks take traditional plastisol screen printing and direct-to-garment. Cotton fiber absorbs water-based and DTG ink, which is why those prints feel like part of the shirt.
- Blends like CVC sit in the middle and handle both reasonably well, which is exactly why they sell.
| Style | Fiber content | Weight | Fit and sizes | Best use |
|---|---|---|---|---|
| 6210 Unisex CVC T-Shirt | 60% combed ring-spun cotton, 40% polyester | 4.3 oz (145 gsm) | Regular crew fit, XS to 6XL | Everyday branded wear and broad size runs |
| 6200 Unisex Festival Tee | 65% polyester, 35% combed ring-spun cotton | Lightweight knit built for sublimation | Soft, fashion-oriented fit | Sublimation and bright all-over prints |
| 3600 Unisex Cotton T-Shirt | 100% cotton | Lightweight combed ring-spun | Regular unisex fit, full size run | Screen print and direct-to-garment designs |
Size range is a sales decision, not a footnote. A single line that covers XS through 6XL, like the 6210, lets one product serve a school, a team and a walk-in customer without you building separate garment families.
Order one sample of your shortlisted blank before you list it. Check the color against your screen, the hand feel against your design, and the print result on the actual garment. If you want to see how other blanks stack up first, this comparison of the best tee shirts for printing puts the alternatives side by side. Matt Schmitt has built and scaled ecommerce print-on-demand brands totaling over $50,000,000 in sales, and he treats the blank as the first decision rather than the last one.
How to Place a Design for Shirts That Sell
Placement decides how a shirt reads from across a room and how the print sits on the body. The same artwork can look premium or amateur depending on where it lands.
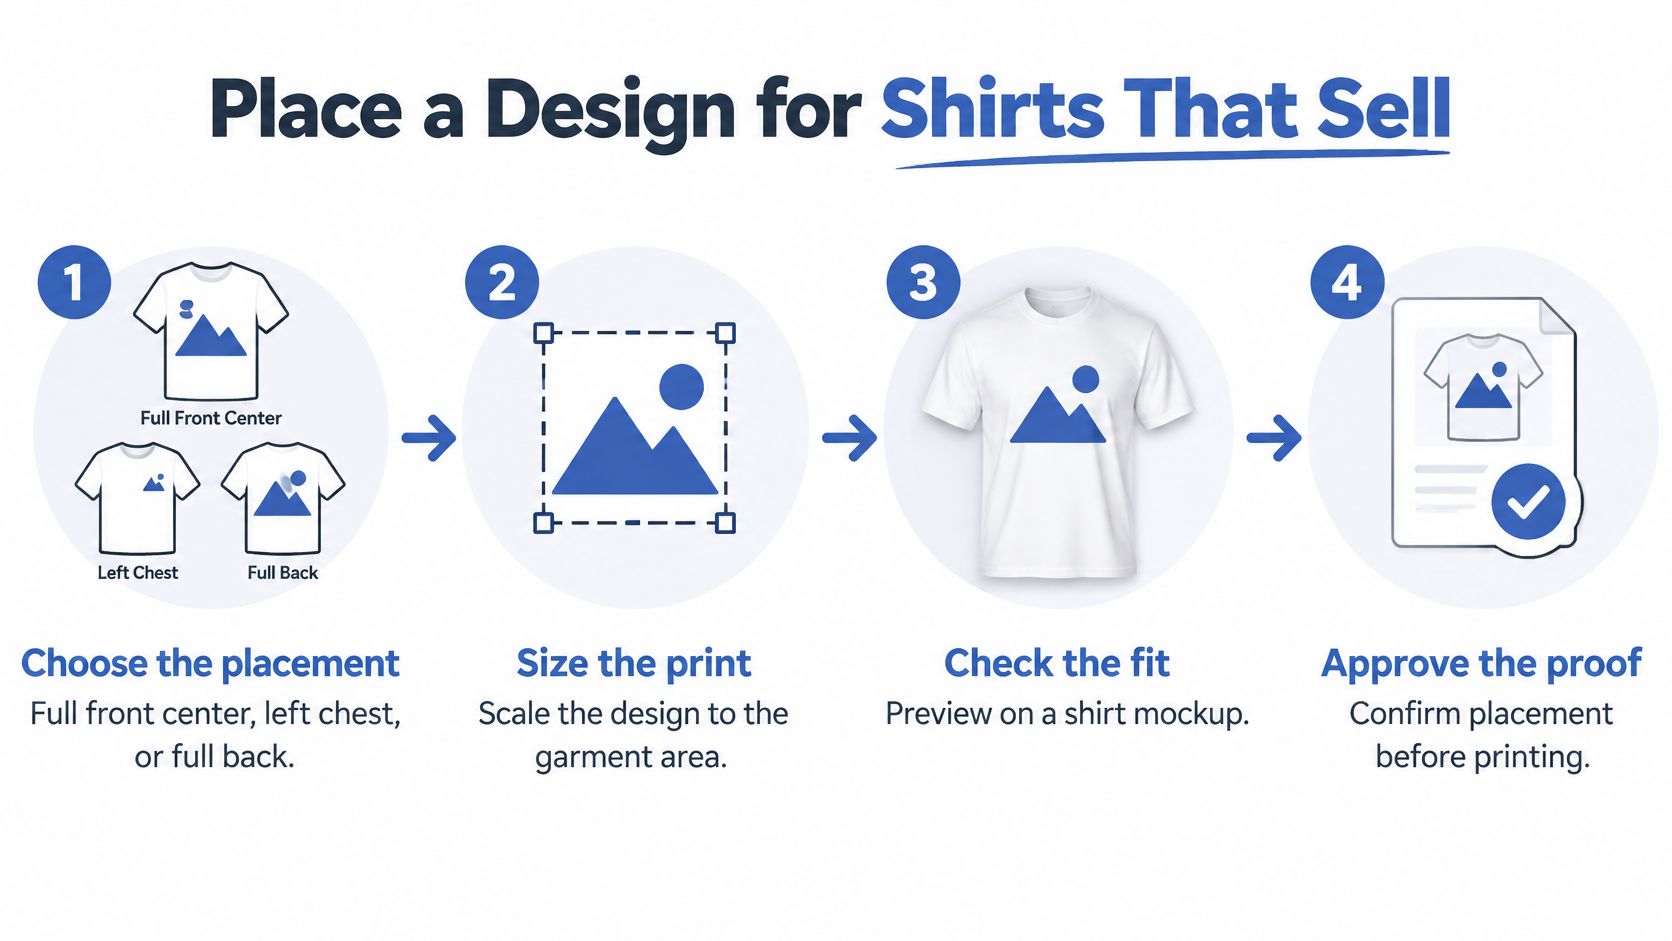
The seven-step placement routine
- Choose the placement. Full front center, left chest, or full back. Each one suits a different product idea: full front for statement art, left chest for a logo that reads as a uniform, full back for a big payoff when someone walks away from you.
- Set the print area to the garment. A large front statement design can run up to about 12 by 16 inches; a left chest logo belongs around 3 to 4 inches wide. Oversized art on a small garment looks like a printing error, not a style.
- Measure from the collar seam, not the hem. The top edge is what the eye reads, and anchoring it to the collar keeps every size consistent. Measure from the hem and the print slides upward on larger sizes.
- Center horizontally, then set the drop. For front prints, aim for a vertical gap of about 2 to 3 inches below the collar. This is the single number that makes a chest print look intentional.
- Preview on a mockup at real garment size. A design scaled to fill your monitor hides proportion problems. View it at the size of the actual shirt and the imbalance shows up immediately.
- Export at 300 dpi on a transparent background. Crisp edges come from resolution, and transparency stops a white box appearing around art on a colored shirt.
- Approve a physical sample or a digital proof before listing. Screens lie about color. A press proof or a sewn sample doesn't.
Practical rule: step back three feet from the sample. If the design doesn't read clearly from there, it's too busy, too small, or too low.
The most common slip isn't artwork quality, it's measurement. Sellers measure from the bottom because that's where the ruler sits naturally, then wonder why a 2XL looks different from a small. For a deeper look at sizing graphics to garments, this guide to t-shirt graphic size breaks down the proportions by placement.
Why Prints Crack and How to Fix Them
Print durability depends far more on ink-film curing and wash testing than on the shirt brand alone. The Printing Industries of America explains in its technical guide to textile washfastness that the entire ink film must reach its required curing temperature to fuse correctly to the garment. Insufficient heat is a leading cause of abrasion and wash failure, and a print that can't survive roughly five to six washes points to a curing problem rather than a bad blank.
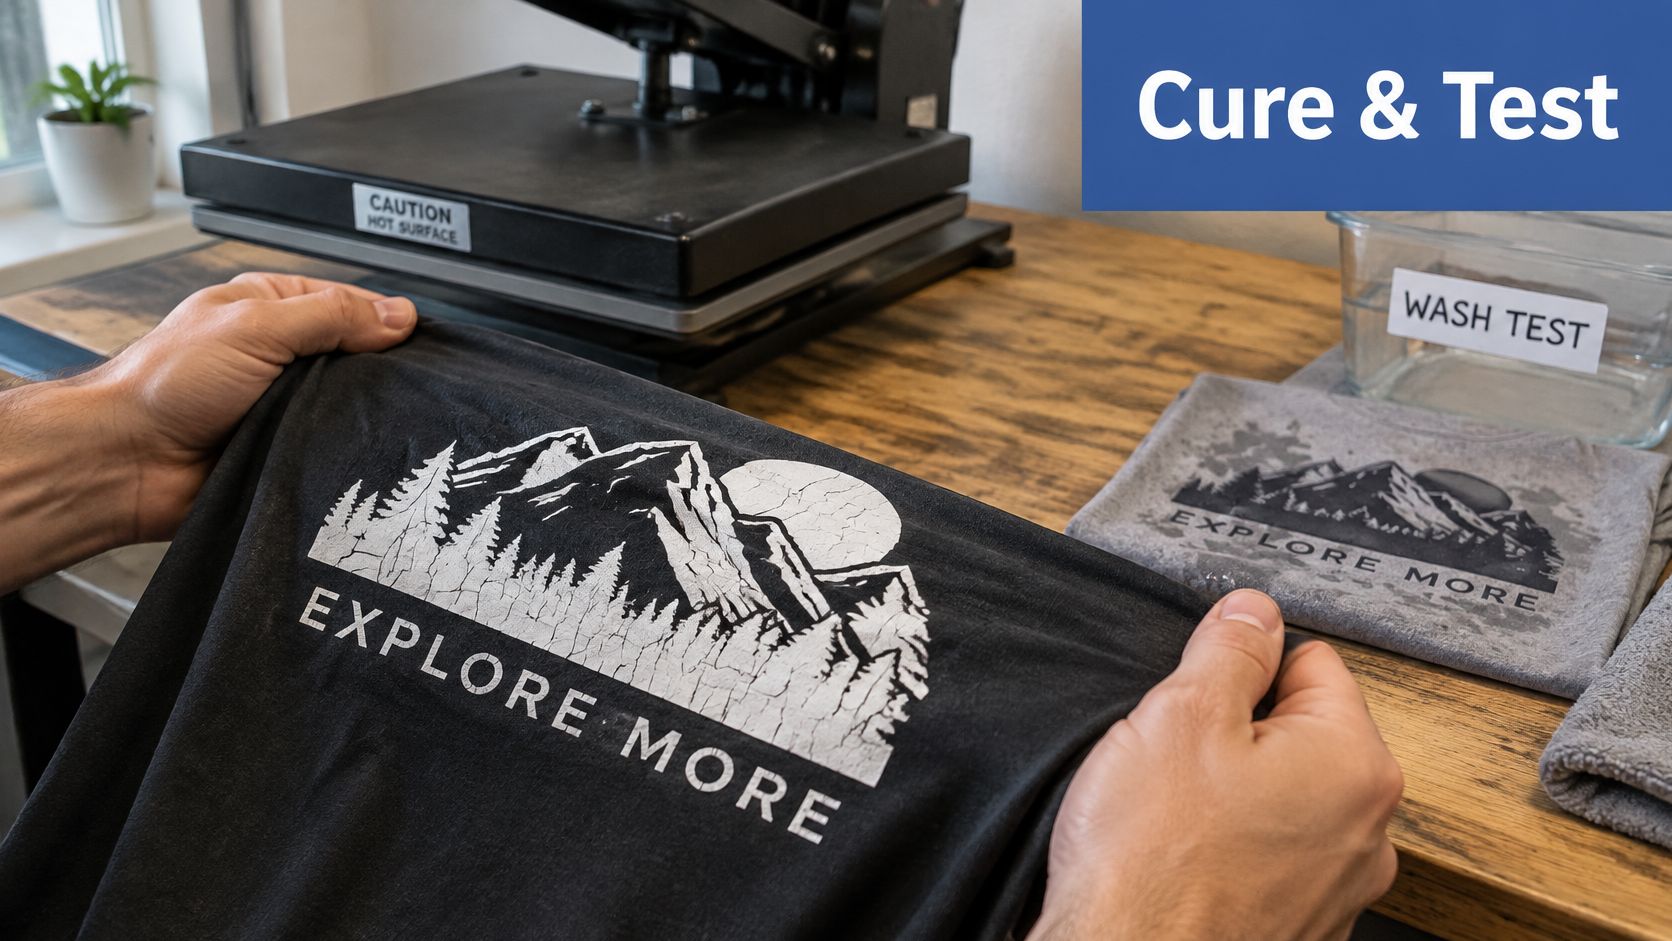
The mechanism is simple once you picture it. Ink is a plastic that has to melt, flow into the fiber and then cool as a solid film. Underheat it and the film stays weak, so the wash cycle abrades it away. Overheat a polyester-rich CVC blank and the fiber itself reacts, which is where color shifts come from.
Two variables that control most failures
The same guidance notes that thinner ink films cure more readily, need less heat, and generally hold up better in the wash. That's why a dense underbase on a dark garment is harder to cure than a light one-color print. Plastisol commonly flashes around 180 to 250°F, so measure the thickest part of the graphic with a heat probe instead of trusting the conveyor setting.
| Symptom | Likely cause | Fix |
|---|---|---|
| Print cracks after a few washes | Ink film not fully cured | Raise the cure temperature at the thickest part of the graphic and re-run the wash test |
| Design looks dull on a dark shirt | Ink too thin or no underbase | Add an underbase and confirm the ink recommendation for the blank |
| Stiff hand feel on the finished shirt | Heavy ink film or high coverage | Reduce the design's ink coverage or simplify the artwork |
| Print sits off-center | Placement measured from the hem, not the collar seam | Re-measure from the collar seam and re-check the sample |
| Colors shift on CVC blanks | Polyester sensitivity to heat | Lower the heat setting and test on a sample before full production |
Some fixes are a settings change on the next run. Others need a fresh sample, and pretending otherwise wastes a production cycle.
Curing and placement account for most of the complaints that get blamed on the shirt. Test the process before you blame the fabric.
The wash test you can run this week
- Print a sample on the exact blank and color you plan to sell.
- Wash it inside out in cold water on a gentle cycle.
- Dry it on low heat or air dry.
- Inspect for cracking, fading and edge lift after every cycle.
- Change one variable at a time and repeat before relisting.
Care instructions help your customer, but they don't replace proper curing. For a wider view of how each method behaves on different fabrics, this breakdown of the different types of t-shirt printing covers the trade-offs.
Run Your Print-on-Demand Workflow From Mockup to Delivery
A print-on-demand order runs in a straight line. The customer buys, your production partner prints the blank you selected, and the parcel ships without you storing a single shirt. Your job is the four decisions before that order exists.
First, you build the mockup that shows the design on the chosen blank. Then you place a sample order from your own store and inspect what arrives. Next, you confirm the size chart against the blank specifications, because a chart copied from another product is the fastest way to earn a return. Finally, you write listing copy that matches the actual fabric and fit, so the customer's expectation is set before checkout.
What to check on every sample: print alignment against your placement measurements, color accuracy against the mockup, stitching at the collar and hem, and fit on a real body.
A mockup stops being decoration and becomes quality control at this stage. Skup's own AvatarIQ was created specifically for print-on-demand apparel and jewelry businesses, and it builds a custom product mockup in one click from the product type you choose plus the kind of person or place you want the shirt shown with. That means you can test a listing concept without booking a photographer or a model, and the test happens before you spend on inventory.
The encouraging part is what this model removes. You don't need to buy fifty shirts to find out whether a design sells. You need one listing, one mockup and one sample, and the market tells you the rest.
If a sample passes inspection and the mockup matches it, the listing is ready to go live. If the mockup looks better than the sample, fix the mockup, not the listing photos.
Custom Next Level Shirt Ideas That Work in Practice
Four scenarios, each showing how the rules from the earlier decisions combine. These are illustrations of the logic, not reports from real stores.
The end-of-year teacher shirt. A middle school teacher wants a shirt her class will really wear. The 6210 CVC blank handles it: a small left chest logo around three inches wide, and a bold back print with the class name and year. The blend holds up through repeated washing over a school year, and the XS to 6XL run covers every student without a second product line.
The fishing club shirt. A club wants a shirt that reads from thirty feet across a dock. The 6200 Festival Tee is the natural home for it, with a full-back design or a sublimated all-over print in bright color that polyester holds without fading. Sublimation on a cotton-heavy blank would disappoint here, which is the whole point of matching fabric to method.
The rescue dog charity tee. One simple front design, centered around 12 inches wide, sold to a community that buys for the whole family and often orders twice. A straightforward front print keeps cost down, which matters when part of the price is a donation.
The gym tee. A training crowd cares about how a shirt feels mid-set. A 100% cotton blank with a simple front print gives that dry, natural hand feel, and a single-color design cures cleanly with less heat demand.
Here's the habit that turns these into a business. List three designs in one niche, track sales for two weeks, and keep the design that earns the most orders. Then build variations from the winner instead of starting over with a new idea.
Order Your First Sample Shirt This Week
A sample turns a shirt idea into something you can assess: the blank, print placement, design and finished feel all meet in one product. Choose a blank, place a design, order the sample, wash-test it, then decide whether it is ready to list. That sequence keeps the first test focused and gives you a chance to spot problems before offering the shirt.
The print-on-demand market was valued at approximately $10.8 billion in 2025 and is projected to reach $57.5 billion by 2033, with a 23.6% compound annual growth rate from 2026 through 2033, according to Grand View Research's print-on-demand market report. Those figures provide context, but your first useful step is simpler: test one design on one blank.
Skup offers AvatarIQ, the Apparel Cloning System and The Incubator. The Apparel Cloning System teaches product and design research, while AvatarIQ creates one-click mockups based on a product type and the setting you choose. Visit Skup to explore those tools and training, then order your first sample this week.