Print on Demand Enamel Pins: A Complete Seller Guide
A pin can be a tiny product with a surprisingly big story behind it. Olympic pin collecting grew from event souvenirs into a major trading culture: at the 1992 Barcelona Olympics, approximately 500,000 people visited official pin-trading sites, and during the 1994 Lillehammer Winter Olympics, a local company reportedly produced and sold 18 million pins. Those milestones show why a small piece of metal can carry value beyond its materials: identity, affiliation, scarcity, and collectability all matter (pin-trading history).
That's an exciting foundation for print on demand enamel pins, but the business model needs a little more thought than uploading art and waiting for one-off orders. Traditional enamel production can involve tooling, minimum quantities, proofs, and lead times. The opportunity is to match the production method to the design's demand, then build a brand around original artwork, clear quality standards, and a community that wants to collect.
Table of Contents
- Why Enamel Pins Are an Exciting Frontier for POD Sellers
- What Print on Demand Enamel Pins Actually Are
- The Economics Behind a Profitable Pin Business
- Designing Pins That Actually Survive Manufacturing
- Choosing the Right Launch Model for Your Pin Store
- Compliance and Quality as a Real Competitive Edge
- Building Listings and Marketing That Actually Sell Pins
- Your Next Steps to Launch a Pin Brand That Lasts
Why Enamel Pins Are an Exciting Frontier for POD Sellers
A pin can turn a shared interest into something people wear, display, and collect. A seller who turns a local bird into a mascot gives that community a badge of belonging. The artwork needs to be original and recognizable, with enough meaning behind it that buyers want more than a decorative object.
That gives enamel pins a distinct opportunity for POD sellers: test a focused idea before committing to a broad catalog. A design tied to a local place, niche hobby, or community in-joke can resonate with people who recognize the reference. The trade-off is that a small audience may limit sales, so validate interest before investing in inventory or a larger run.
The wider market offers a reason to take the category seriously. One industry forecast estimates the global pin-buttons market at $2.6 billion in 2025, projecting $4.03 billion by 2034; it estimates enamel pins made up 34% of 2025 sales and projects annual growth of approximately 6% for the enamel-pin segment (pin-buttons market forecast). Treat these figures as directional: the report's market definition includes several kinds of pins and related products. They suggest enamel pins belong to a substantial product category, not that any individual design will sell.
Where the upside hides
A good-looking pin isn't automatically a strong product. Buyers collect designs that express something they care about, such as a hobby, identity, fandom, cause, or personal milestone. A small audience can be commercially useful when its members recognize the reference and want to show their connection.
Start with a clear audience and a few designs that share its visual language. Then gauge genuine interest before expanding the collection. This keeps unrelated ideas from muddying the brand and gives each release a chance to strengthen a recognizable point of view. The practical upside lies in testing concepts without treating every design as a guaranteed seller.
What Print on Demand Enamel Pins Actually Are
“Print on demand” describes how you sell and fulfill a pin, not necessarily how each pin is manufactured. A seller supplies an original design, then a production or fulfillment partner makes and ships the product. Unlike a garment printed after each order, conventional enamel pins often need a custom tool and a production run. Digitally printed pins and smaller-batch options can support lower-volume sales, but they are different products and processes.
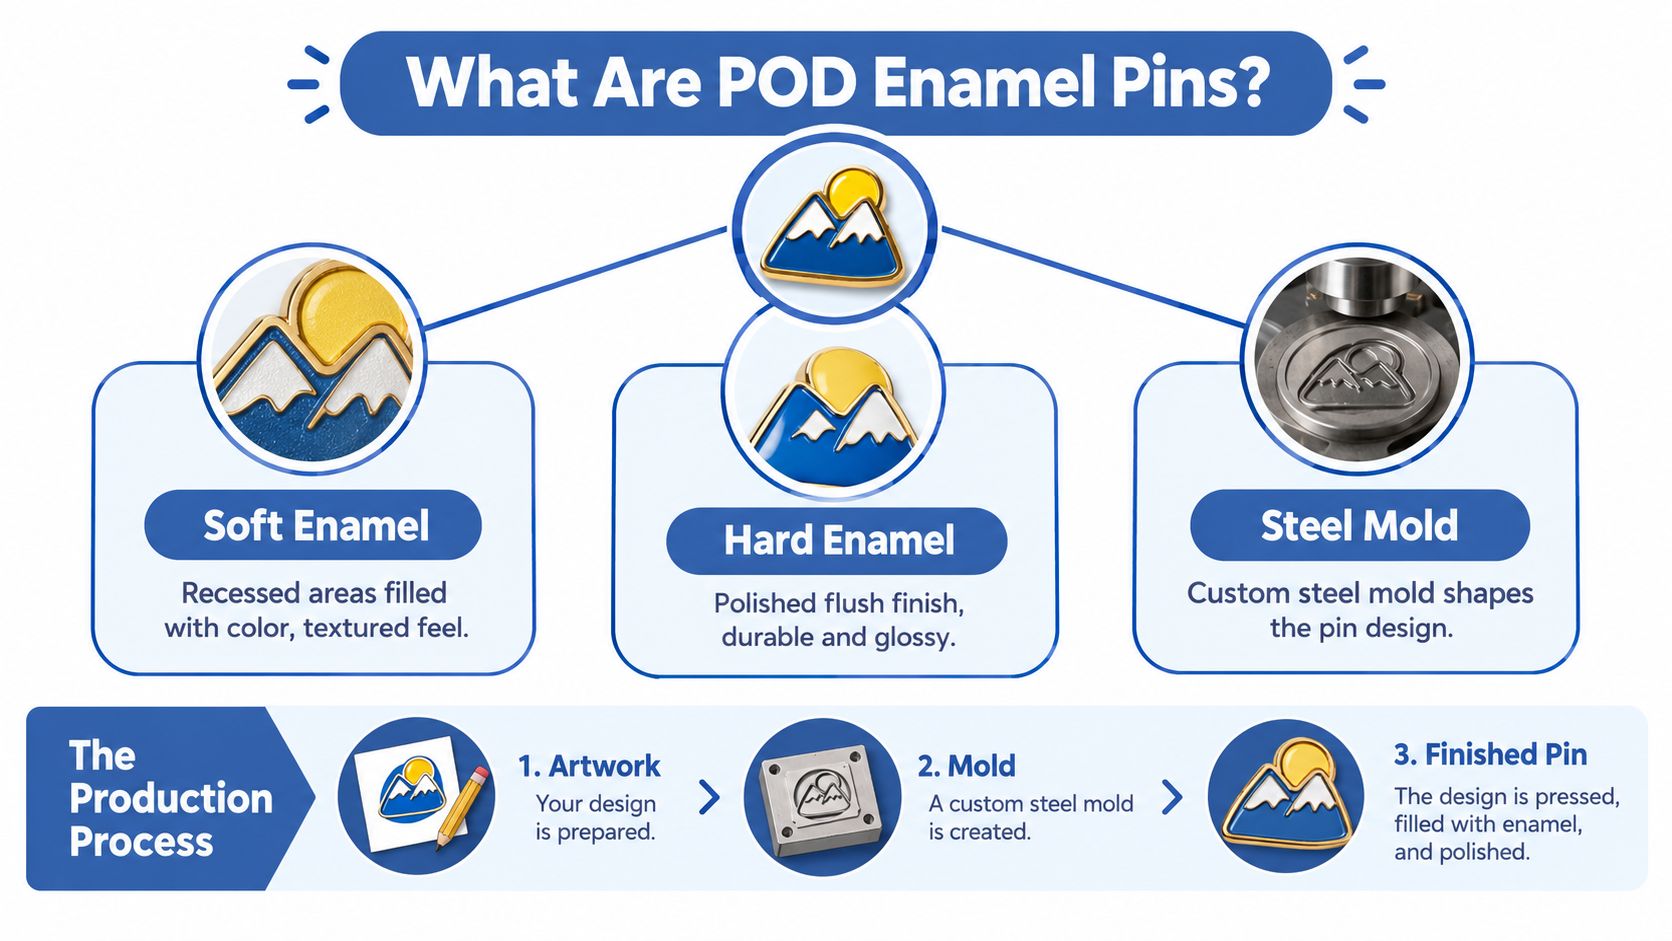
How a traditional enamel pin is made
Production starts with artwork prepared for manufacturing. A steel die stamps the pin's outline and raised metal dividers into the base. Those walls separate the recessed color areas, which are filled with enamel and finished. Plating, polishing, and backing hardware complete the pin.
Soft enamel leaves the color areas recessed, so the raised metal is easy to feel. It typically costs less per unit than hard enamel because it skips the extra polishing step. Confirm the difference with your supplier's quote. Hard enamel is filled and polished to create a smooth, flush surface. The finish may suit a higher-priced design when its artwork, packaging, exclusivity, or licensing supports that positioning.
Why pin fulfillment differs from apparel POD
Ask how a supplier makes its advertised one-off pins. Digitally printed pins can support low-volume orders without conventional enamel filling. Traditional soft- or hard-enamel pins may require a custom steel die and a production run, so confirm the supplier's minimum order quantity and lead time in writing before you commit.
The manufacturing process affects both the product and the launch model. Ask whether the pin is digitally printed or enameled, whether a die is required, what minimum order quantity applies, and when production begins. Get the answers before setting up a listing or promising customers an order-to-shipping timeline. If a supplier offers genuine one-off enamel production, compare its quote and finish with small-batch options rather than assuming every service labeled POD works the same way.
The Economics Behind a Profitable Pin Business
A pin can command a healthy retail price and still leave little profit once tooling, freight, packaging, platform charges, and defects are counted. Calculate what remains after every sale-related cost, then account for one-time setup costs across the sellable units you realistically expect to move.
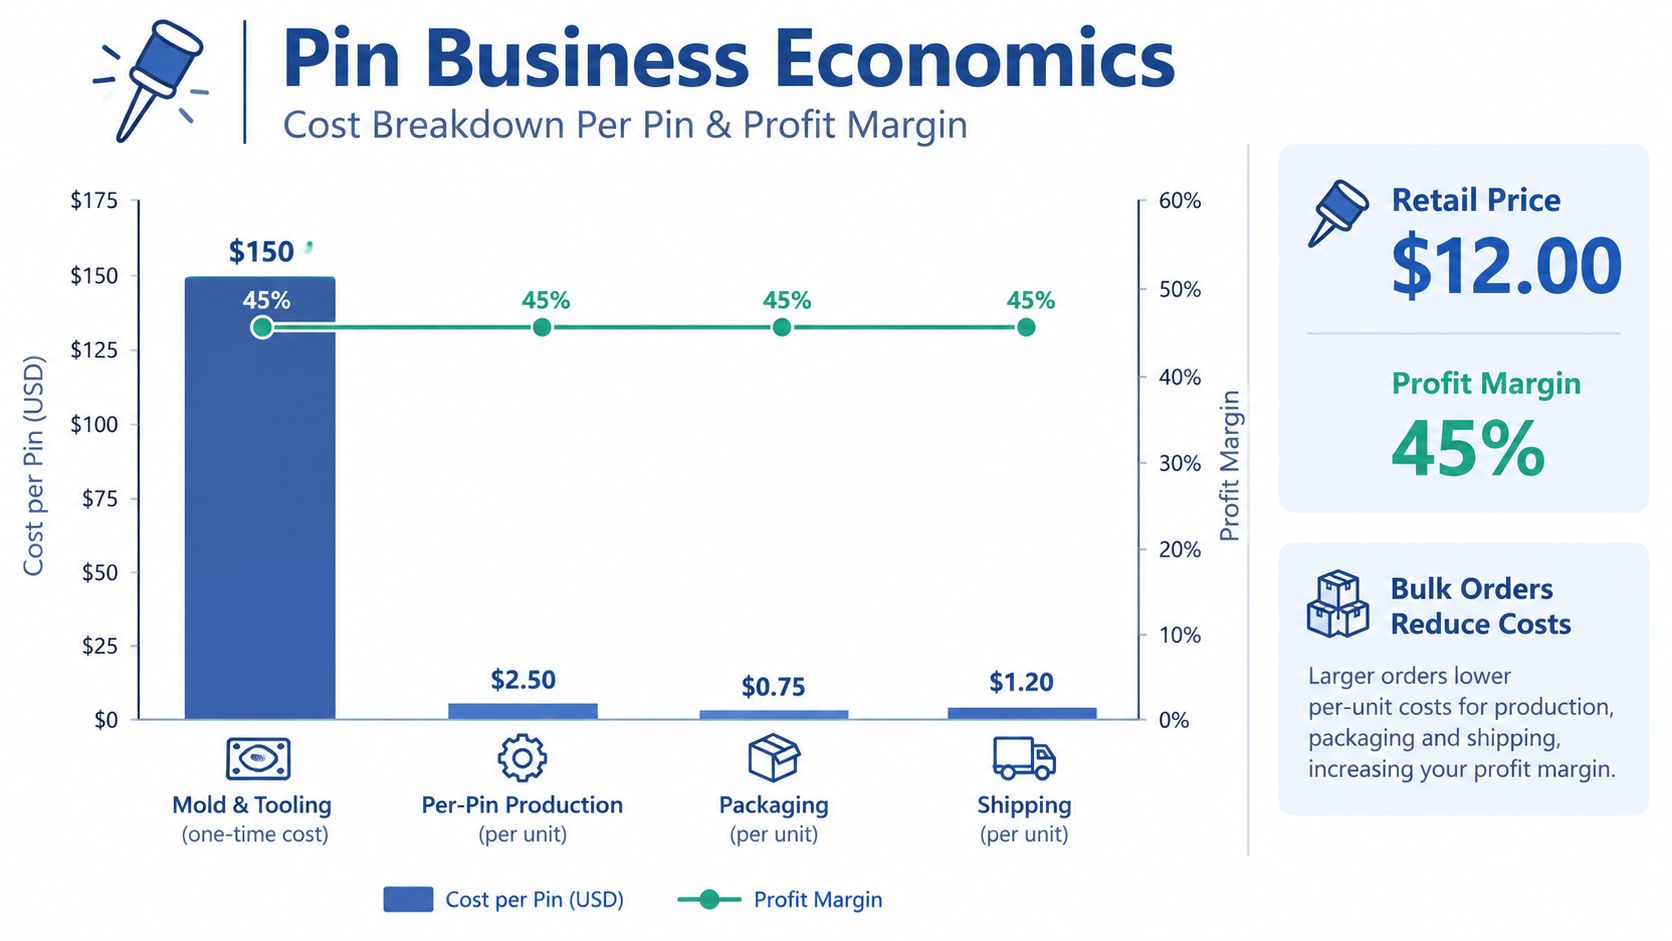
Build the margin from actual supplier quotes
Start with the landed cost of each sellable pin. Include production, freight, packaging, and an allowance for defective units or replacements. Add the marketplace and payment charges for each order, along with any advertising cost you choose to spend to acquire a customer.
For a batch, include the die or mold in your launch budget. Divide that one-time cost by the sellable units you expect to move, not your hoped-for sales. Small runs carry more tooling cost per pin. Larger runs spread that cost across more orders, but tie up more cash and leave you holding unsold inventory if demand stalls.
Practical rule: Don't call a design profitable until you've priced a replacement for a flawed unit and included the cost of getting the pin to the customer.
Use this contribution-margin formula:
Retail price − production − packaging − shipping − marketplace and payment charges − advertising − defect allowance = contribution before fixed overhead.
Work from your supplier's written quote and the fee schedule for your actual marketplace. For a closer look at how product margin differs from business profit, use this guide to print-on-demand profit margins.
Treat market estimates as context, not your forecast
Broad market estimates can suggest that pins have buyers, but they cannot tell you whether a particular design will sell or what your store will earn. Your own margin depends on the quote, production method, finish, and price customers will accept. Soft enamel may suit a design where a lower unit cost matters; hard enamel may support a higher-priced offer when its finish and the rest of the product justify it.
Match the launch model to what you know about demand. A digitally printed pin or micro-batch can test an unproven design without committing to a larger inventory order. Pre-orders can help gauge interest before you pay for a conventional enamel run, though you still need a supplier timeline you can meet and clear customer expectations. Once demand is clearer, compare the cost of replenishing a batch with the cash and inventory risk of ordering more upfront.
The next concrete step is to request itemized quotes for one-off production, a micro-batch, and a conventional enamel run. Put each option through the same margin formula before setting a retail price.
Designing Pins That Actually Survive Manufacturing
A digital illustration can look crisp on a screen and still fail as a pin. Metal dividers need enough width to form cleanly, and recessed areas need room for enamel to fill. Tiny lettering and crowded color fields are especially risky because stamping, polishing, and filling can soften or distort small details.
Design for the physical object
Practical production guidance puts reliable raised metal lines around 0.2 mm at minimum, with 0.25–0.35 mm giving more margin, especially on small or hard-enamel pins. Common minimum fill widths are approximately 0.25 mm for soft enamel and 0.30 mm for hard enamel, and text below roughly 1 mm high may lose legibility (enamel-pin artwork guidance). Another manufacturer recommends 0.3 mm as a practical minimum for metal lines and color spacing, with 0.4 mm lines and 0.5 mm spacing as safer working targets (pin design guide).
These figures aren't a substitute for your manufacturer's specifications. They are a reason to avoid fragile detail and request a production check before approving a design.
A repeatable artwork and mockup workflow
- Build a clear silhouette. Make the outer shape recognizable at a glance, and don't rely on a delicate outline to carry the whole concept.
- Simplify the smallest details. Thicken fragile lines, open up narrow gaps, enlarge color pockets, and remove lettering that won't remain readable at the finished size.
- Prepare clean vector paths. The manufacturer needs production-ready art, not just a flattened image. Confirm the required file format and color specifications with the supplier.
- Inspect at final size. Zooming in on a large screen can hide problems. Check the artwork at the pin's actual physical dimensions, then ask the manufacturer to flag any details that may not hold.
- Create realistic listing visuals. AvatarIQ can help you generate original design directions and create professional product mockups and photoshoot-style images without booking a model or studio. Use those visuals to review the pin in context, but don't present a mockup as proof of the finished product's exact color or surface.
For a fuller walkthrough of artwork preparation, use this guide to designing for print on demand. If you're creating a wider collection, this resource on scaling creative workflows across SKUs can help you keep concepts and variations organized without letting the catalog lose its visual cohesion.
Before you pay for a production run, send the manufacturer the final-size artwork and request confirmation that the lines, spacing, and fills are workable. That one check is more useful than polishing details that the die can't reproduce.
Choosing the Right Launch Model for Your Pin Store
Your launch model determines how much cash sits in unsold pins and what delivery promise you owe customers. Choose based on how much demand you can verify and how quickly you need to fulfill orders, not on a supplier's marketing label.
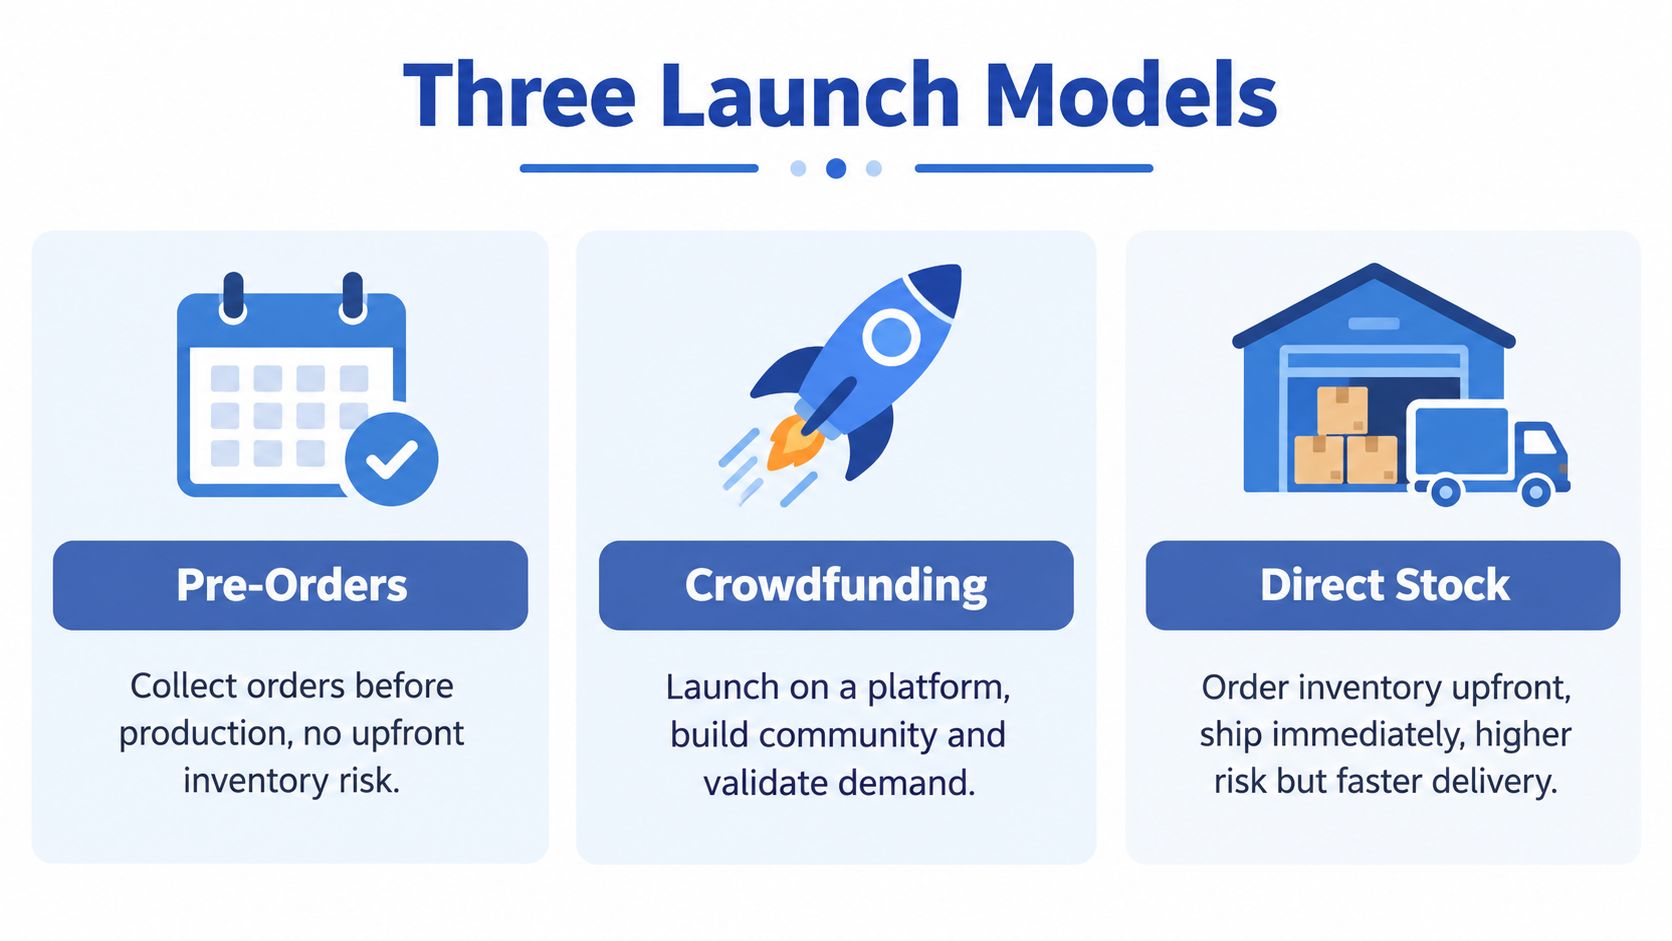
Pin Launch Models Compared
| Model | Typical MOQ | Cash Risk | Best For |
|---|---|---|---|
| Pre-orders | Confirm with supplier; tied to the order plan | Lower inventory exposure, but funds and delivery expectations must be managed clearly | A seller with an engaged audience and a design ready for production |
| Micro-batch | Some suppliers cite 50 pieces as a practical minimum (MOQ and lead-time guidance) | Moderate, because you pay for a limited run before all units sell | Testing demand while holding a small amount of stock |
| Stocked inventory | One manufacturer reports a typical 1,000-unit minimum for traditional enamel, as noted above | Higher, because unsold units and storage remain your responsibility | A validated design with demand strong enough to justify a larger run |
Pre-orders test whether customers will pay before you fund a full batch. They also create a delivery commitment. State that production begins after the order window, give buyers a realistic estimated timeline, and update them if the supplier's schedule changes.
A micro-batch limits the inventory risk and can work for testing a design or serving a small community release. Stocked inventory fits a proven design when customers value faster delivery or you need more control over packaging. Before comparing quotes, ask each supplier how proofs, freight, and production lead times affect the total cost. Those details shape your order fulfillment strategy for brands.
Compare print-on-demand company options and confirm that each provider supports your chosen pin type and production method. Then request written quotes for digital printing, micro-batch enamel, and conventional enamel. Compare landed cost and lead time side by side before choosing how to launch.
Compliance and Quality as a Real Competitive Edge
A well-made pin is part of the brand experience. So are accurate product details, transparent production information, and a clear plan for handling defects. Buyers can't assess your supplier from a product photo, but they can see whether you explain what they're buying and how it's made.
On Etsy, sellers can work with a production partner when the item is based on their own original design. They must disclose the applicable production partner on the listing and provide accurate information about where the item ships from (Etsy's production-partner policy). The rules also call for information about the partner's name and location, the nature of the relationship and design process, and a general description of the work the partner performs (Etsy's production-partner details).
Make quality visible without overclaiming
Request supplier documents for materials and finishes, and keep those records with the design and order details. If you sell internationally, check which product and disclosure requirements apply to the destination and ask the supplier what documentation they can provide. Don't describe a pin as lead-free, certified, or compliant unless you have documentation that supports that specific claim.
Before a batch is approved, request a proof and agree on the expected colors, finish, and acceptable tolerances. Inspect samples when practical, record problems with clear photos, and decide in advance how you'll handle replacements or refunds. For a supplier you intend to use again, keep a simple file of the approved artwork, proof, production notes, and any issues from the batch.
This approach isn't paperwork for its own sake. It helps you answer customer questions confidently, catch production mismatches earlier, and choose suppliers on more than unit price. Clear disclosures and dependable quality give shoppers a reason to trust an independent brand with their money.
Building Listings and Marketing That Actually Sell Pins
A polished pin can still sit unnoticed if the listing doesn't show who it's for. The product page needs to connect the design to the buyer's interest, make the pin's size and finish easy to understand, and answer practical questions before checkout.
Build the listing around the collector
Use a title that combines the design subject, the type of pin, and the relevant audience or occasion. A listing for an original moth mascot might name the moth design, enamel pin, and the nature or insect-collector niche, rather than relying on a vague title such as “Cute Gift.” Use only terms that describe the product, and avoid using protected names or characters unless you have the rights to do so.
A strong product description covers the physical details customers need: dimensions, finish, backing, materials as confirmed by the supplier, packaging, and fulfillment expectations. Then explain the idea behind the design and why someone in that community might want to collect it. If the item is a limited release, make that clear only when the production plan restricts availability.
Use AvatarIQ to develop listing mockups and photoshoot-style images that show the pin in a real-world setting. Pair those with a clean product view and an image that helps shoppers understand scale, such as the pin on a jacket or bag. Mockups can improve the presentation, but keep them consistent with the actual product and don't use image overlays to imply a finish or feature you can't confirm.
Give a focused collection a route to discovery
Start with organic search on the marketplace where you sell. Build Pinterest boards around the audience and subject, then share the designs in relevant social communities where promotion is welcome. If you test ads, begin with a small, clearly bounded test for the listings that already have the best creative and strongest audience fit. Track visits, saves, orders, and customer questions so you can improve the listing instead of increasing spend.
Your launch sequence can stay straightforward: prepare the product and price, publish the listing with complete production details, share it with a relevant audience, and review how people respond. If shoppers click but don't buy, revisit the images, pricing, shipping information, and product explanation before adding more designs. The goal is to make each listing answer the buyer's questions and make the collection feel worth following.
Your Next Steps to Launch a Pin Brand That Lasts
Enamel pins don't have to be a quick experiment. They can become a durable collection when you make deliberate choices about audience, artwork, production, and customer trust. The strongest first move isn't ordering a large run. It's choosing a design and learning what it takes to make that design clear, manufacturable, and appealing to a real community.
Use the next month to create momentum:
- Choose a niche. Pick a community or interest you can design for with originality and respect.
- Validate one concept. Show the idea to likely buyers and listen for specific interest, not just polite compliments.
- Prepare the production artwork. Check line widths, fill areas, and final-size legibility with the intended supplier.
- Create AvatarIQ mockups. Build product visuals that let you test the presentation before committing to inventory.
- Choose a launch model. Compare pre-orders, a micro-batch, and stocked inventory against your cash limits and delivery promise.
- Request a sample or proof. Confirm the finish and production details before you publish a firm product description.
- Draft two listings. Give yourself room to compare how different design concepts and audiences respond.
The opportunity isn't reserved for sellers who already know manufacturing inside out. Start with one well-considered design, ask better questions of your supplier, and use customer response to guide the next release. That's how a small pin idea can grow into a collection with a recognizable point of view.
Skup helps entrepreneurs learn the fundamentals of building a print-on-demand business, while its Apparel Cloning system offers a structured approach to launching POD apparel. If you're ready to build your eCommerce skills and explore tools such as AvatarIQ for design and mockups, visit Skup.