Facebook’s Custom Audience feature allows you to hyper-focus on a highly specific segment of your audience.
In fact, you can focus your targeting around customers or individuals who have already interacted with your brand.
Facebook uses the tracking pixel to trace individuals who have engaged with your social accounts, visited your site, and even made a purchase.
You can then use these audiences to create hyper-specific retargeting ads or lookalike audiences, aka new audiences who are most likely going to behave like your current customers and engagers.
A Deep-Dive Into Facebook’s Custom Audiences
According to Facebook, “With Custom Audiences, you can reach customers you already know with ads on Facebook. Just upload a list of contact info like email addresses or phone numbers. You can also use info from your website or app. We’ll deliver your ad to those people if they’re on Facebook.”
One of the many benefits of using custom audiences is that you’re targeting warm traffic, aka people who are already familiar with your brand. So an ad that uses custom audiences in its targeting will always out-perform interest-based ads.
There are 3 broad types of custom audiences you can use to run ads to your eCommerce store.
- Customer List Custom Audiences
- Website Custom Audiences
- Engagement Custom Audiences
Now let’s take a look at each.
Customer List Custom Audiences
You can upload a list of phone numbers, email addresses, or Facebook user ID’s to create a custom audience.
Facebook then matches these identifiers with the users on its platform. Typically, Facebook is able to match up to 70% of the people on your contact list.
Ideally, you’d want to use a customer list custom audiences for existing customers you have that can’t be tracked through the pixel or engagement on Facebook or Instagram. Just make sure you’re uploading data from customers who have given you permission to market to them.
Website Custom Audiences
You can track visitors and buyers through the Facebook Pixel.
This allows you to target customers who have visited particular pages, added to cart, and purchased from you – which you can then use to create powerful retargeting or cross-sell ads.
The best part about this type of custom audience is that it updates itself automatically.
And if you have particular rules and segments set up for your custom audiences, then each new user that falls within these guidelines will update into the appropriate segment. If you don’t have any rules for your custom audience then the list will update to add anyone who visits your site.
Engagement Custom Audiences
There’s a way you can target exact Facebook users who have shown interest in your brand by engaging with your posts.
Facebook tracks users who have liked or commented on image and video ads, as well as any events or forms you have on Facebook or Instagram.
When you’re creating these audiences, you’d want to choose a relatively recent time frame to create these audiences – as you will soon see.
Why You Need To Use Custom Audiences
I’ve already mentioned that custom audiences provide us with an amazing remarketing tool… but the malleability of these lists is uncapped.
You can target specific customers depending on what context they fit and how likely they are to buy.
They’re magical.
I’m going to go through a few instances where using custom audiences would be to your advantage.
Retargeting Abandoned Carts
In a perfect world, each person who added an item to the cart would make a purchase.
But the world of eCommerce is far from perfect.
When you create a custom audience list from website visits then you can easily lure cart abandoners back to make the purchase with timely and persuasive ads.
Retargeting Visitors Who Didn’t Buy
Just like you’d retarget to a person who abandoned cart, you can retarget a person who bounced off a particular product page.
With the right messaging, promotional offer, or even as just a reminder, you can lure a visitor back in so they leave a customer.
Segmenting Your Audience
When you create an ad, it will never be one size fits all.
The perfect copy for one person won’t always be the right message for another, for example.
When you’re targeting people who are at different levels of your funnel, you need to specify ads to fit their needs.
Luckily you can set up your custom audiences to exclude individuals based on conditions you select.
Hooke Repeat Customers
We all know how much easier it is to sell to a previous customer compared to a person who is unfamiliar with your brand.
Prior customers already know and trust your brand and products, so getting sales out of them is super easy.
You can use a custom audience from a customer list to offer special deals, promotions, upsells, cross-sells… you get the idea.
Create A Lookalike Audience
Want to expand your reach to an audience that will make a purchase?
Use your custom audience to create a lookalike audience.
Lookalike audiences are audiences who are similar to your prior visitors or customers, who in turn are more likely to behave like them as well.
When you’re scaling your ads you should always be using lookalike audiences to further your reach.
How To Create Custom Audiences On Facebook
How To Create A Customer List Custom Audience
Step 1: Head to your business manager
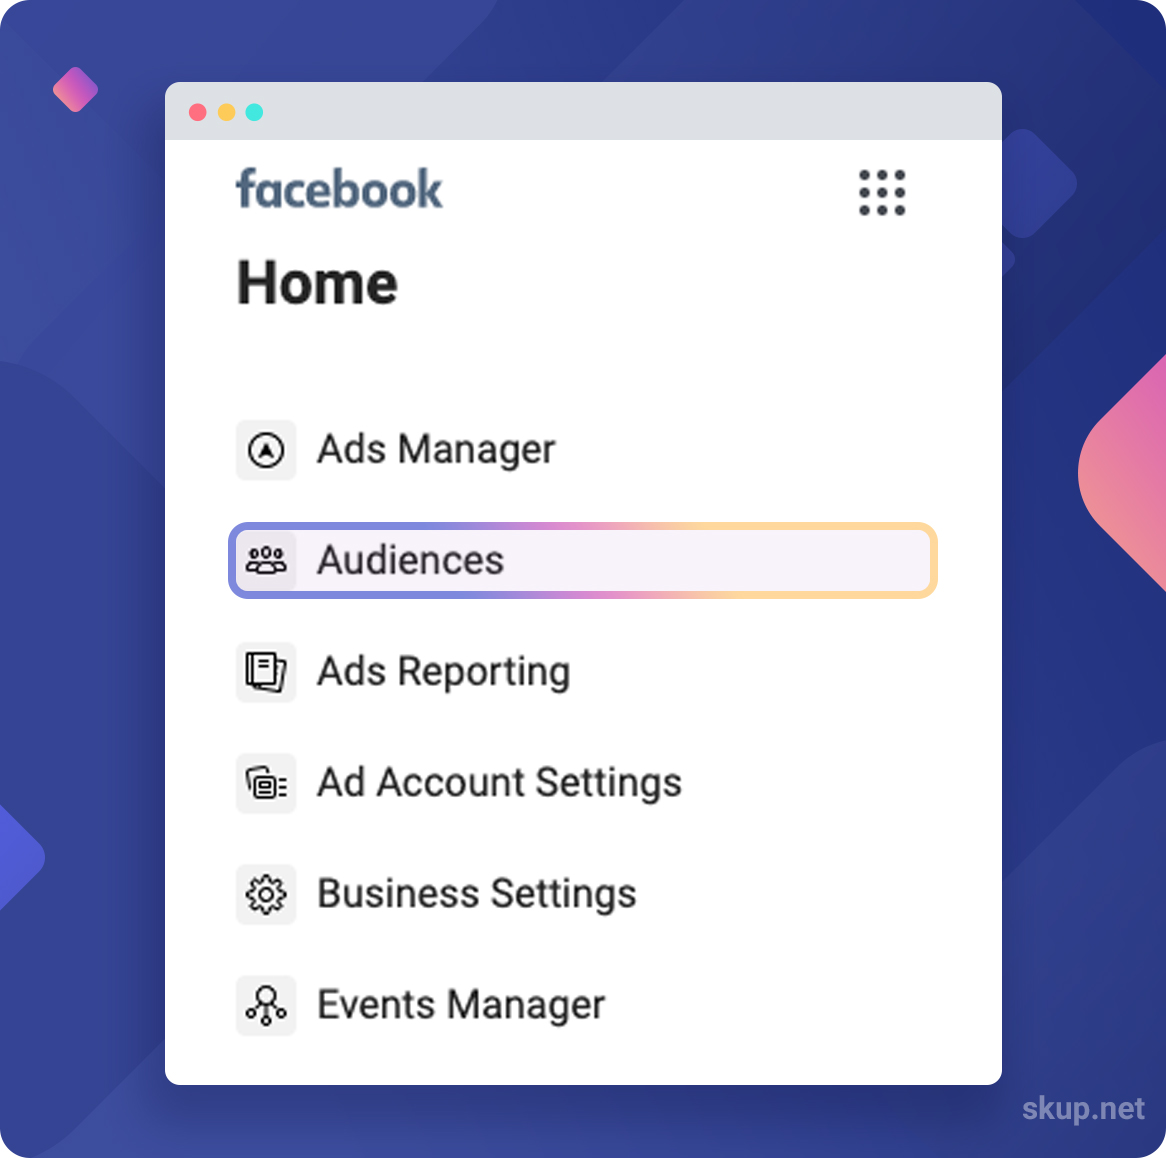
Step 2: Select the Audiences tab from the left side navigation menu

Step 3: Click the blue Create Audience button in the top left-hand corner and select the Custom Audience option

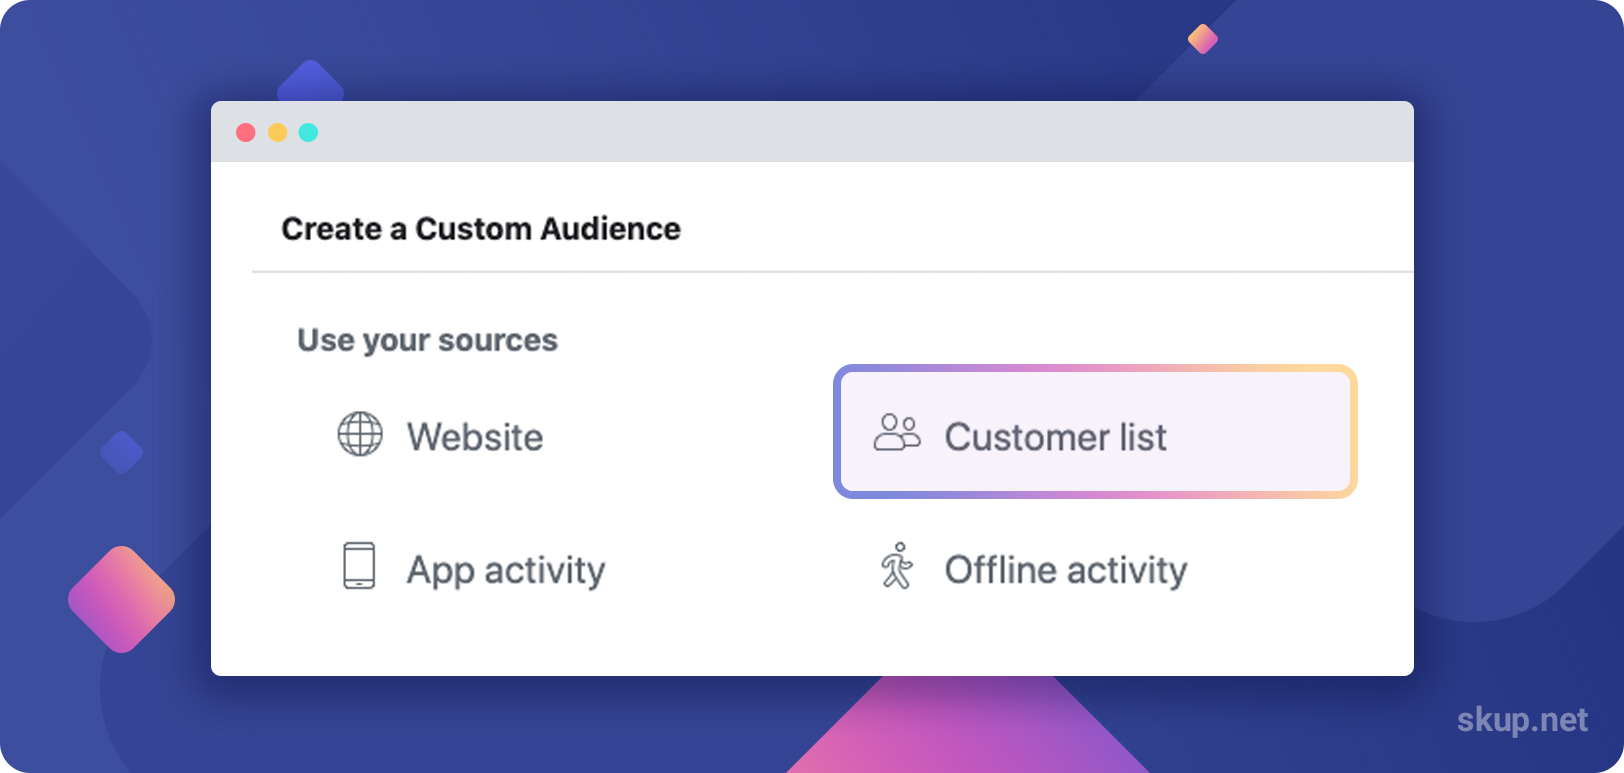
Step 4: Select the Customer List option

Step 5: You can either upload a CSV or import directly from MailChimp
Step 6: If you’re uploading a CSV make sure to match the CSV cells to the fields required by Facebook
How To Create A Website Custom Audience
Step 1: Head to your business manager
Step 2: Select the Audiences tab from the left side navigation menu

Step 3: Click the blue Create Audience button in the top left-hand corner and select the Custom Audience option

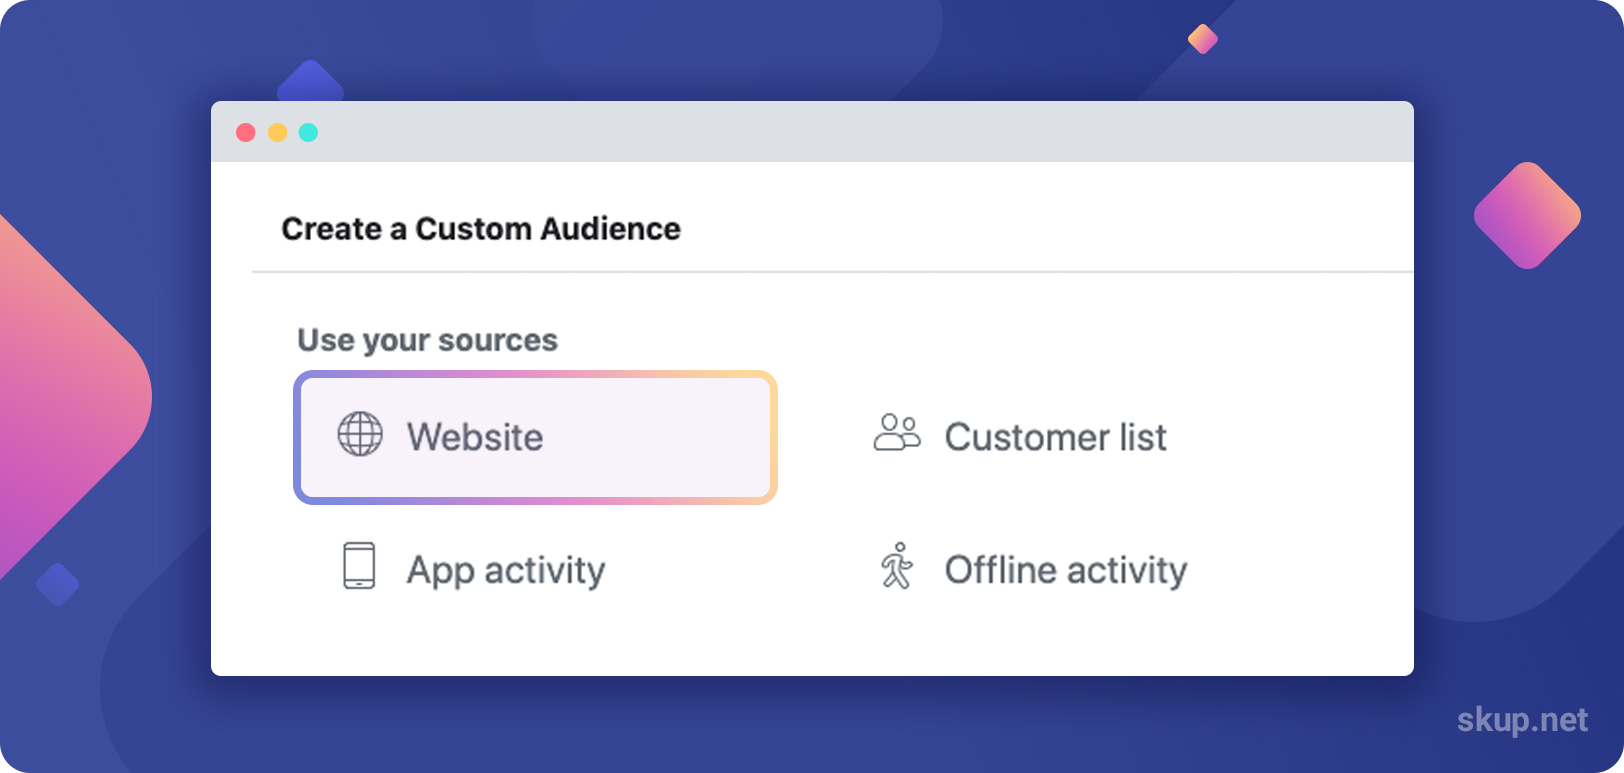
Step 4: Select the Website option

Step 5: We recommend using the following conditions

- View content
- Add to cart
- Purchase
Step 6: The time frame should always be within 30 days
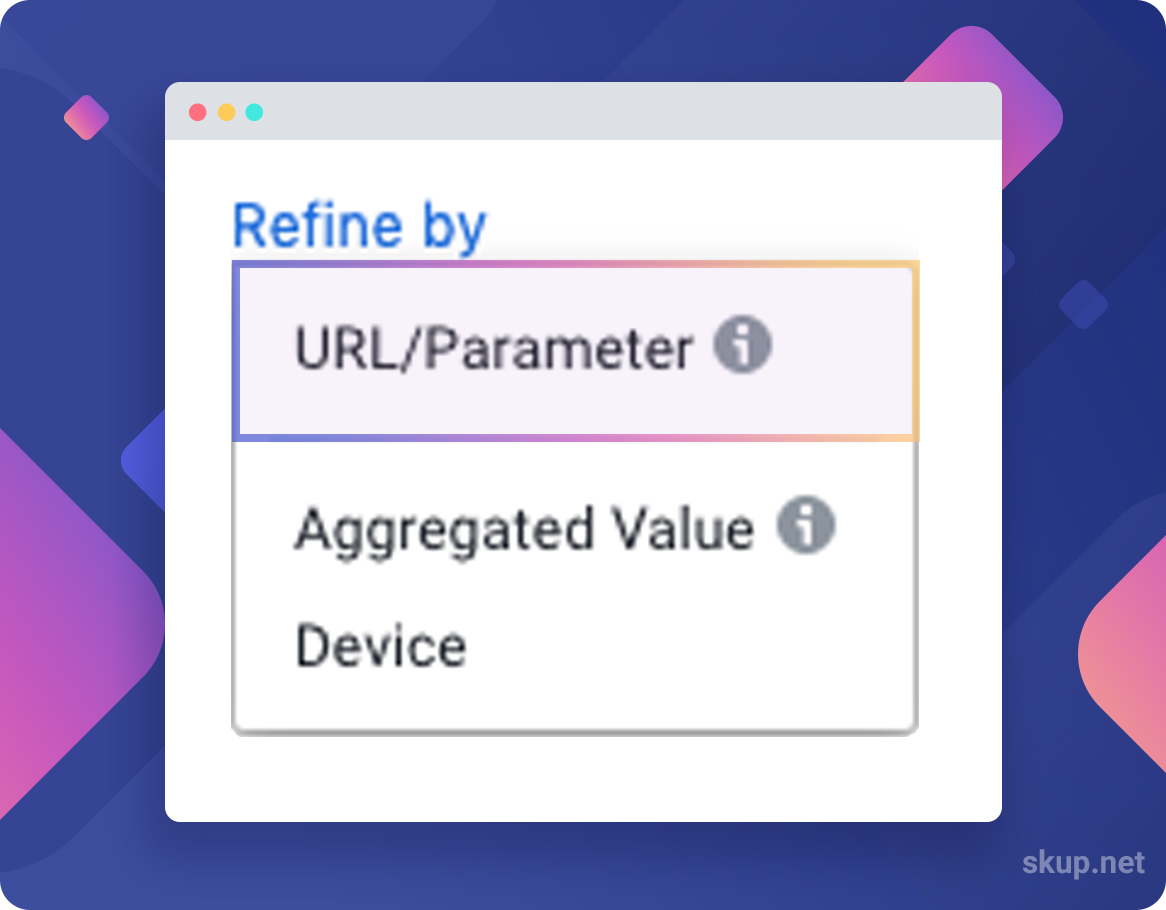
Step 7: Click the Refine By hyperlink below the conditions section and refine by URL Parameter

Step 8: Click the URL drop-down and select content_name
Step 9: Enter the content ID in the content_name section
Step 10: The content ID is the numerical slug from the URL of the admin view of your product on Shopify
How To Create Engagement Custom Audiences
Step 1: Head to your business manager
Step 2: Select the Audiences tab from the left side navigation menu

Step 3: Click the blue Create Audience button in the top left-hand corner and select the Custom Audience option

Step 4: Select any of the Facebook sources you wish to use for this custom audience

-
- We recommend using video, Facebook page, or Instagram. Video is typically the best option and will be used for the rest of this example
Step 5: For the engagement section, you want to select the option of people who have viewed 50%, 75%, or 98% of the video

Step 6: Time frame is irrelevant here so you don’t need to overthink this
Step 7: Name your audience and create
Tying It All Together
In the last few articles, you discovered how to define your audience run profitable ads. If you’re targeting is on point, you now have the perfect formula for your custom audience! Now that we know how to create these audiences, we’re going to put them into use in the next section – retargeting!


